Showing posts with label Home Improvement. Show all posts

Tuesday, 13 June 2017

DIY Pallet Bed


DIY Pallet Bed lights bright.jpg

Kids grow up, and as they do they get longer and heavier. This was the case with my daughter.
Now a preteen, she also started complaining about everything. One of the things she complained about most was her bed. She said it was too short and sagged in the middle.
Since we put her in this bed when she was a toddler, it was the only one she had ever known. So, it shouldn’t have been too surprising, and, if I remember correctly, it was a hand-me-down from my grandmother. Who knows how old the cheap particle board base actually was.
However, I was amazed when I pulled her mattress off to reveal that the platform around the two central side supports had completely disintegrated. Your guess is as good as mine as to where the physical matter is today, but it explains why my daughter said her bed sagged in the middle.
Clearly we needed a quick solution. Thankfully, my daughter is okay with my frugal nature and has a bit of “country girl” in her as well, so she was good with a more rustic-looking bed.
Working together, we had a sit-down with the good people down at the internet until we found a design that we both were satisfied with. It was quick, easy and cheap for me, and looked “sick” enough for her.
Here’s what we made and how we did it:
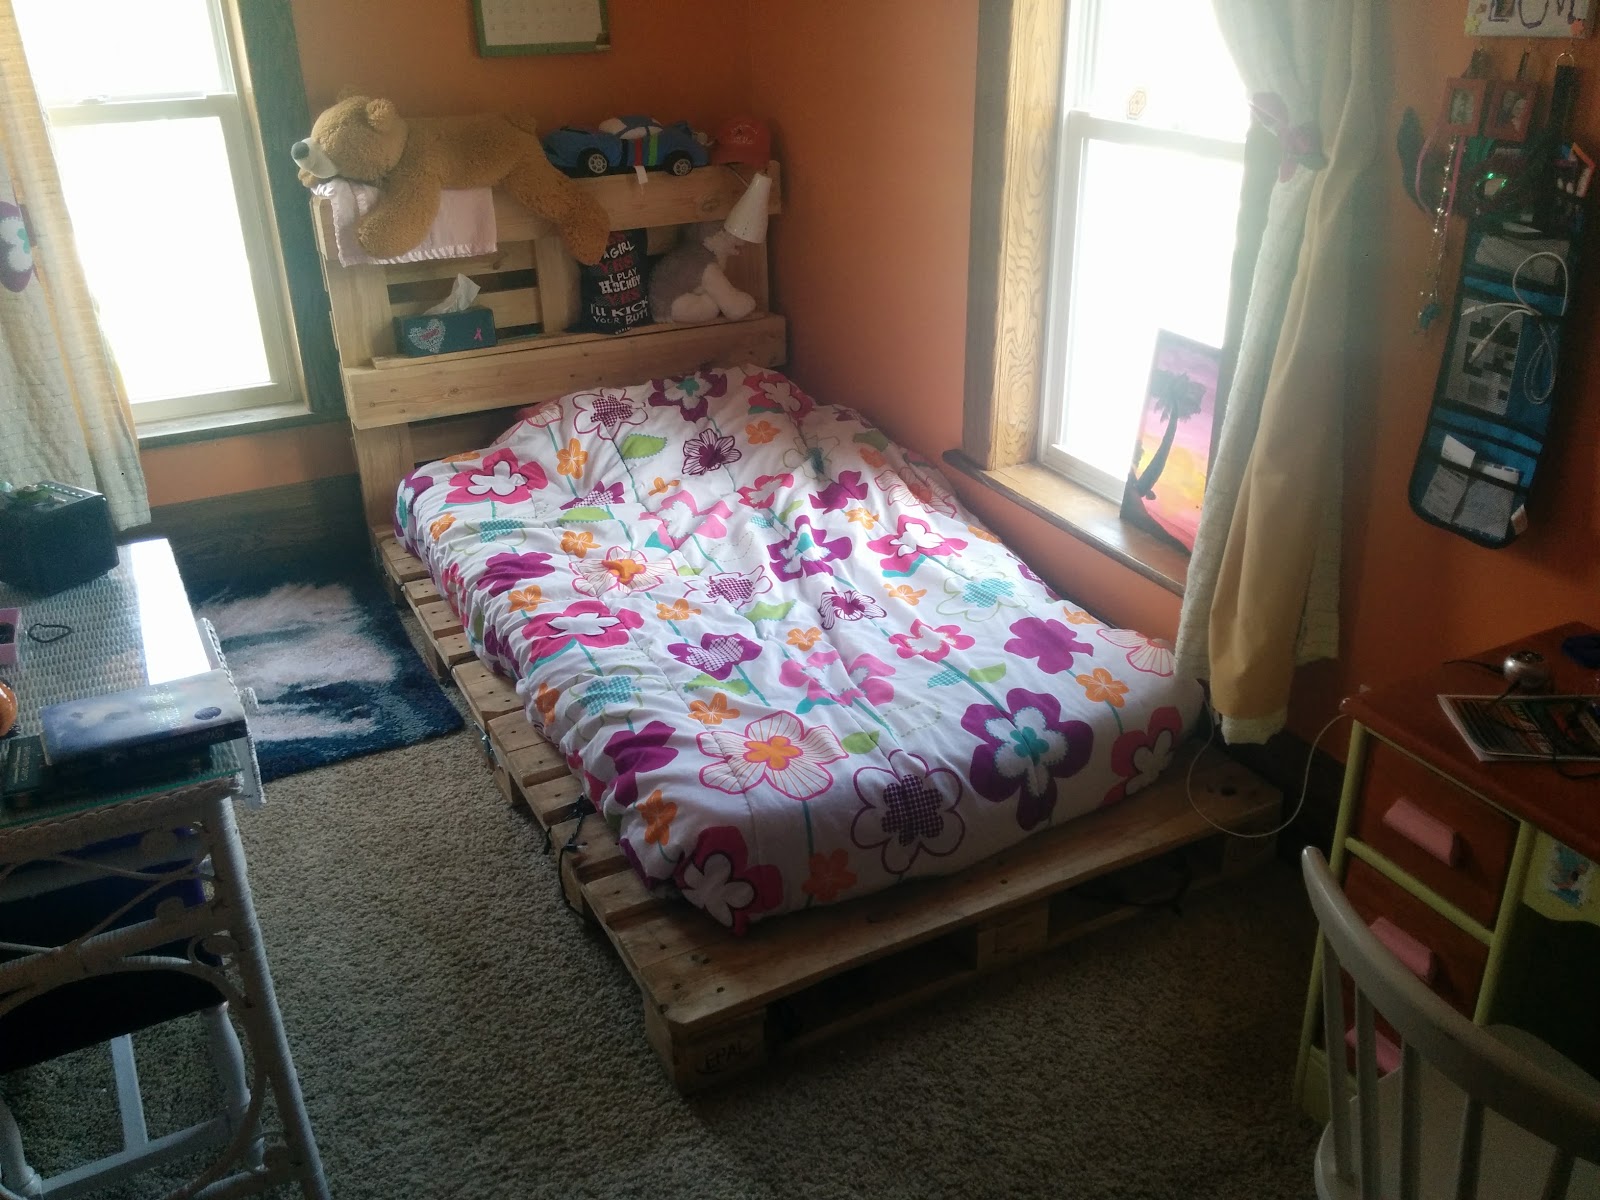
DIY Pallet Bed 1.jpg
As mentioned, this was a very easy build. Not only that, but the bulk of the materials I was able to get for free.
With every shipment we receive at work, it of course comes on a pallet. While we try and reuse as many as possible, ultimately, the pile behind the shop continues to grow. So, with permission, I combed through and picked out three that were still in great shape.
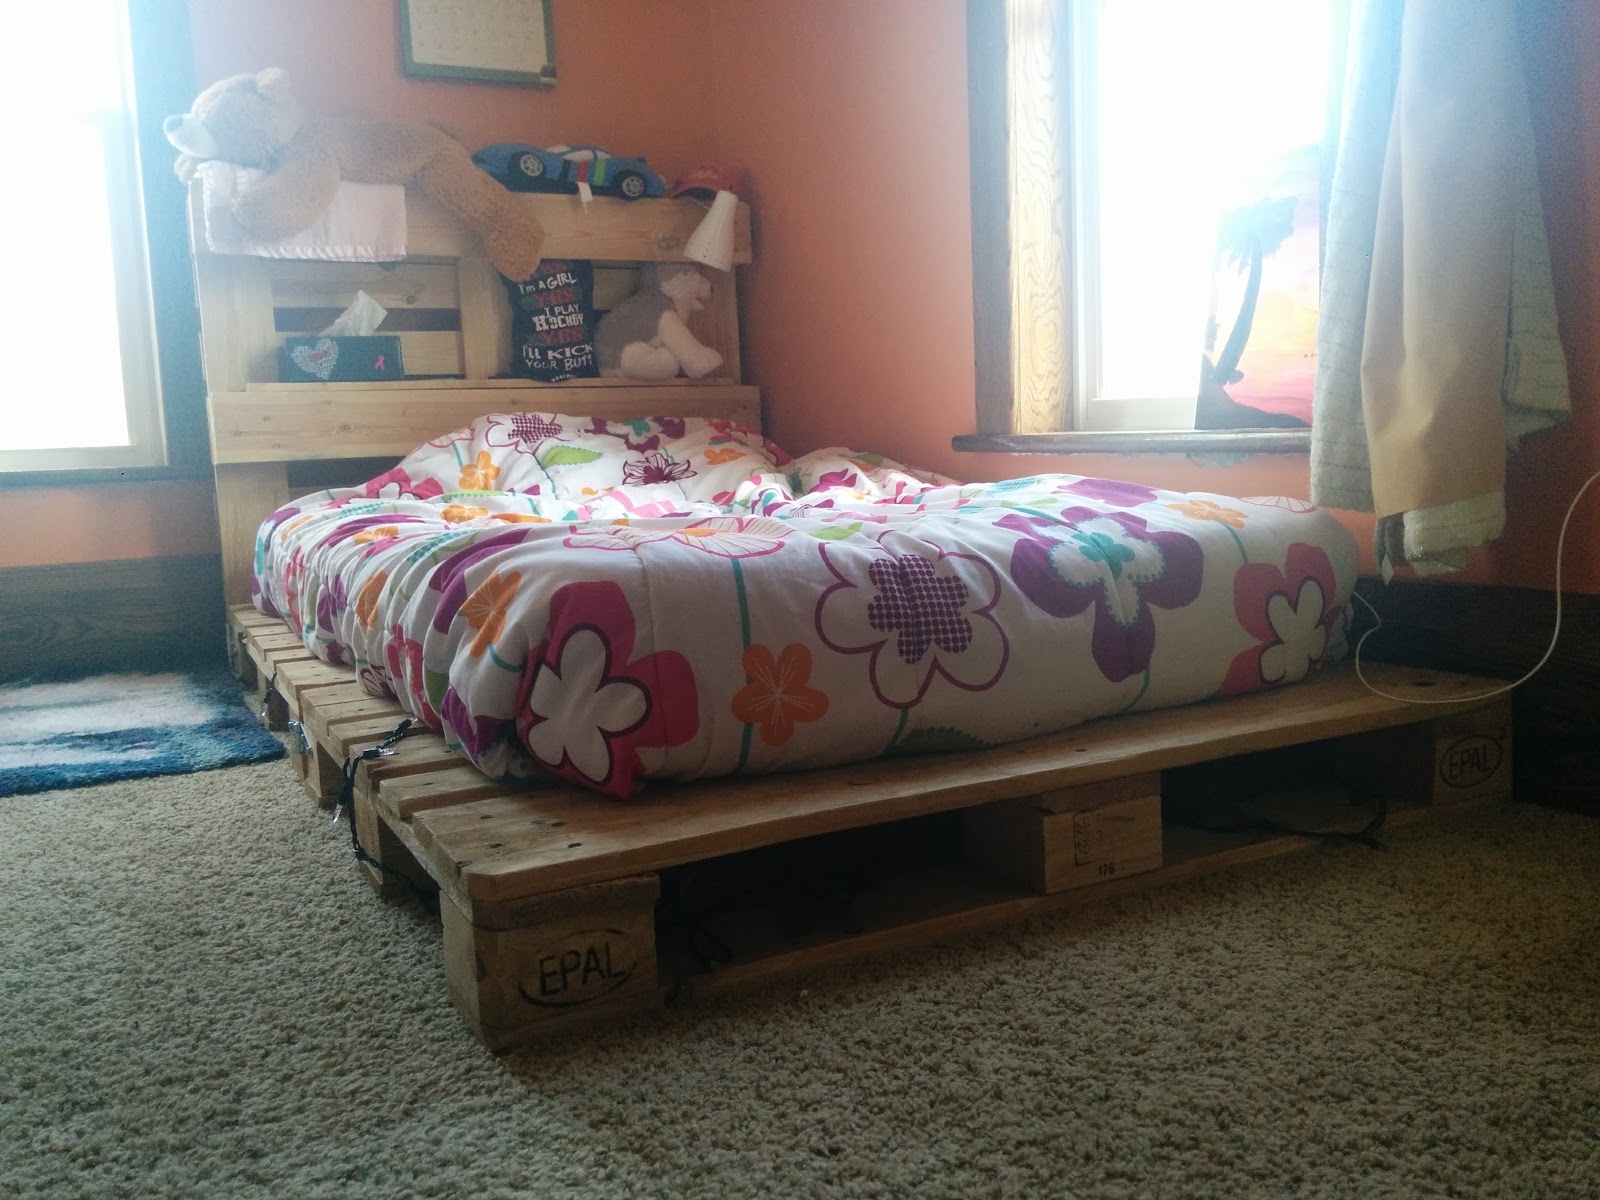
DIY Pallet Bed 2.jpg
At this point, I could have just laid two of them on the floor and called it a day, but my demanding preteen daughter was having none of that. This meant I had to dig out my palm-sander and a few sheets of sandpaper. I made her do at least half of the sanding; it is her bed after all.
Since the bed was supposed to look rustic, we didn’t worry about working down to a too fine of a grit. We just made sure she won’t get any slivers while getting in or out of bed.
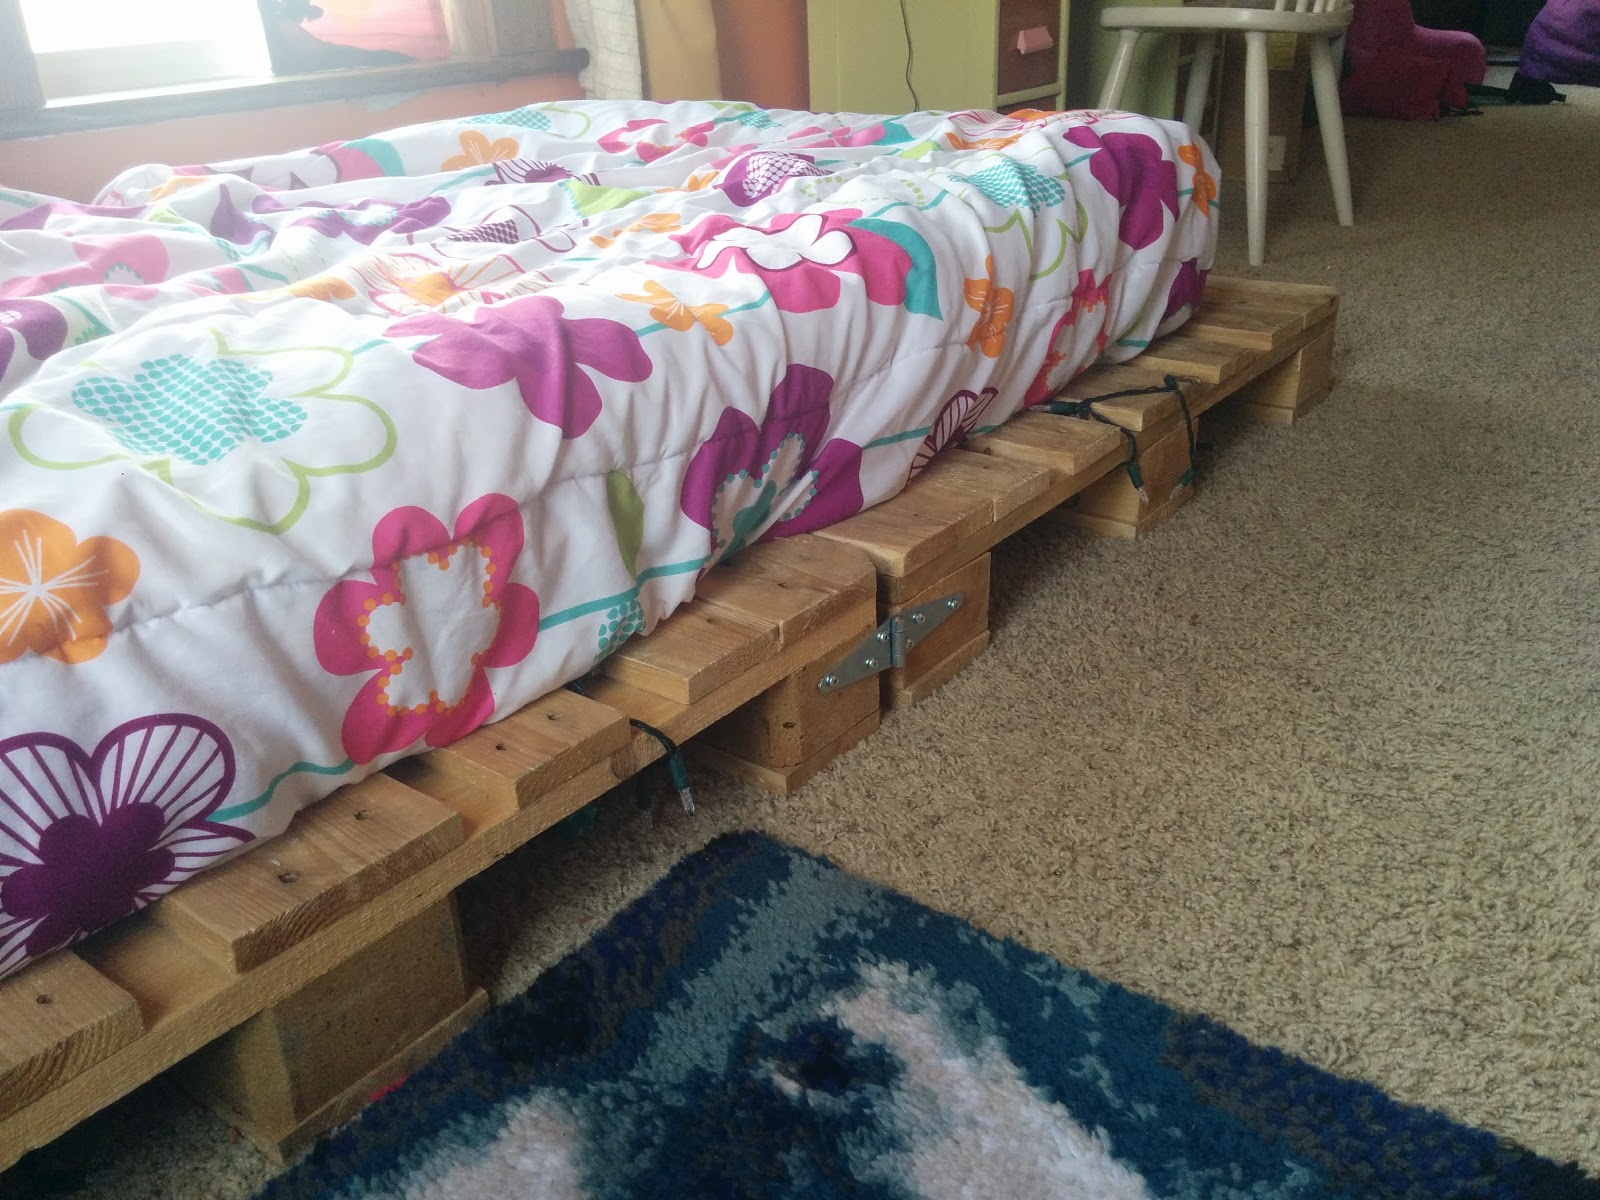
DIY Pallet Bed 3.jpg
With that done, we brought the pallets up to her room and started putting the bed together. Despite the weight of the pallets, I still felt it necessary to lash them together somehow. Being creative (a.k.a. cheap) I went to my local hardware store and bought a few gate hinges.
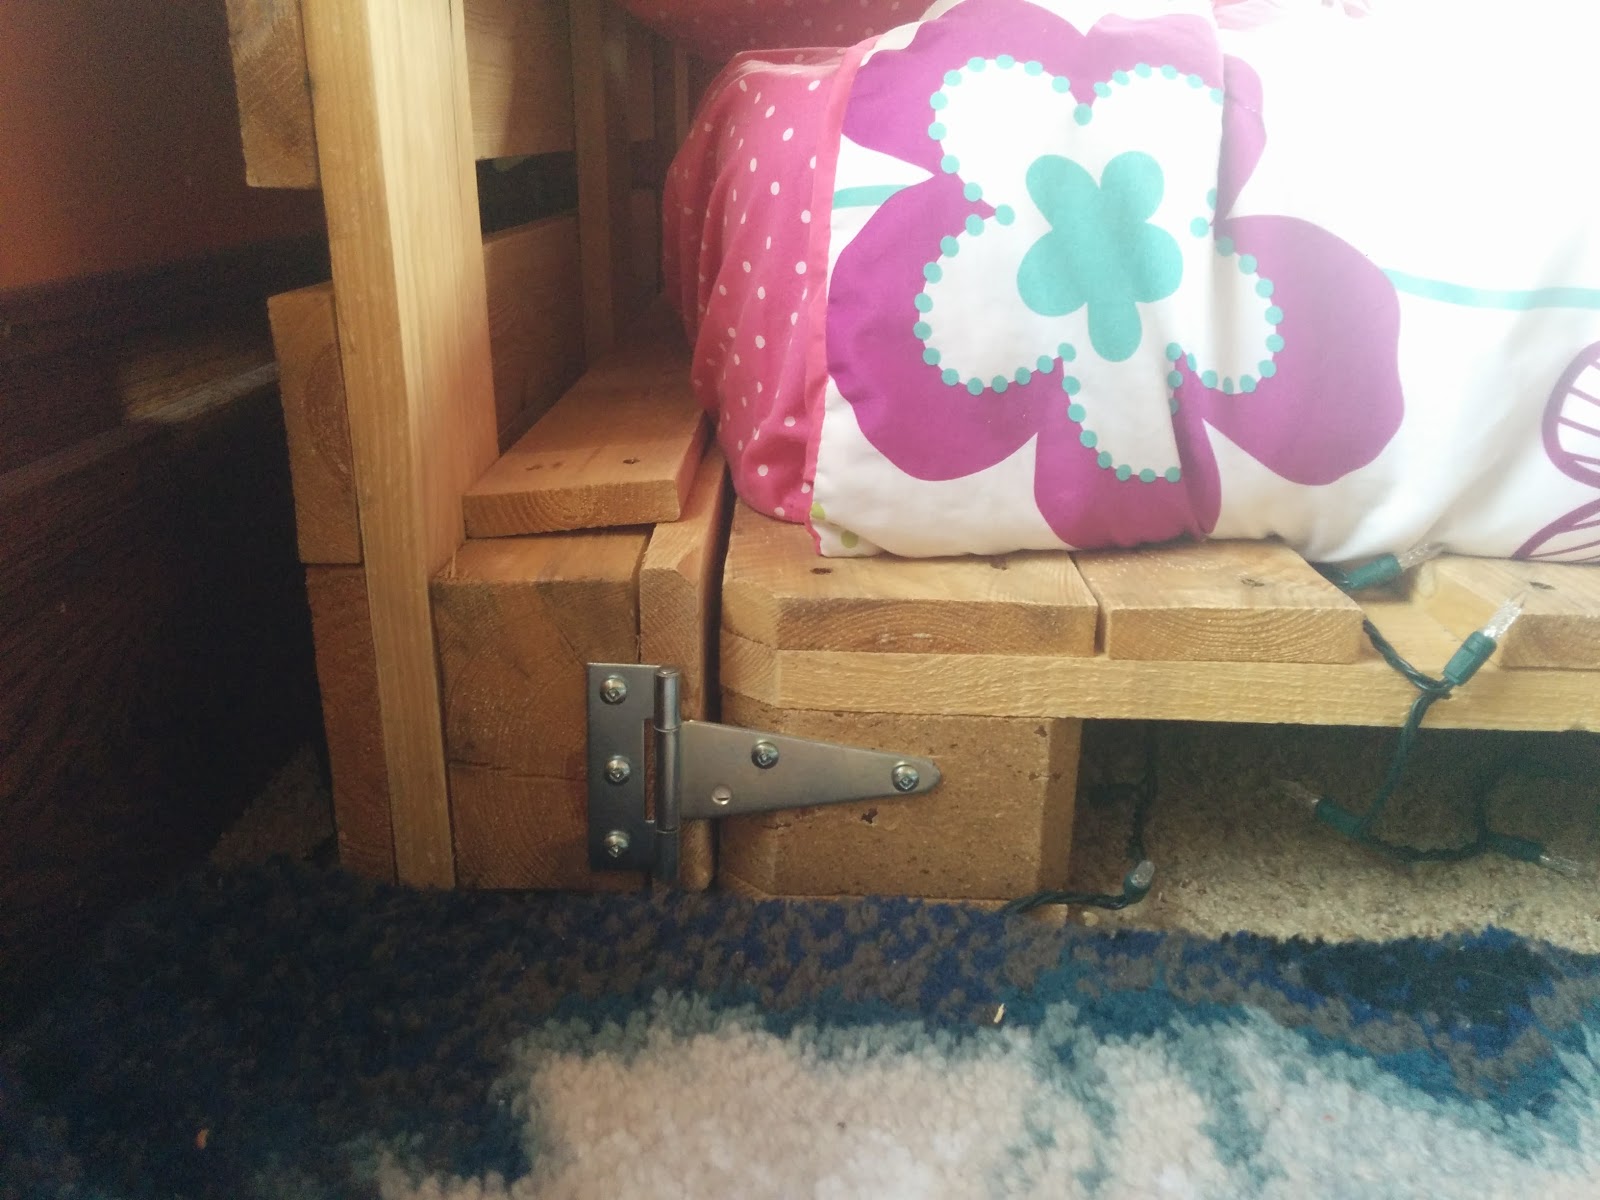
DIY Pallet Bed 4.jpg
My biggest concern was the “headboard.” I was worried that it could fall on my daughter in her sleep, but with a few screws in the base it feels quite solid.
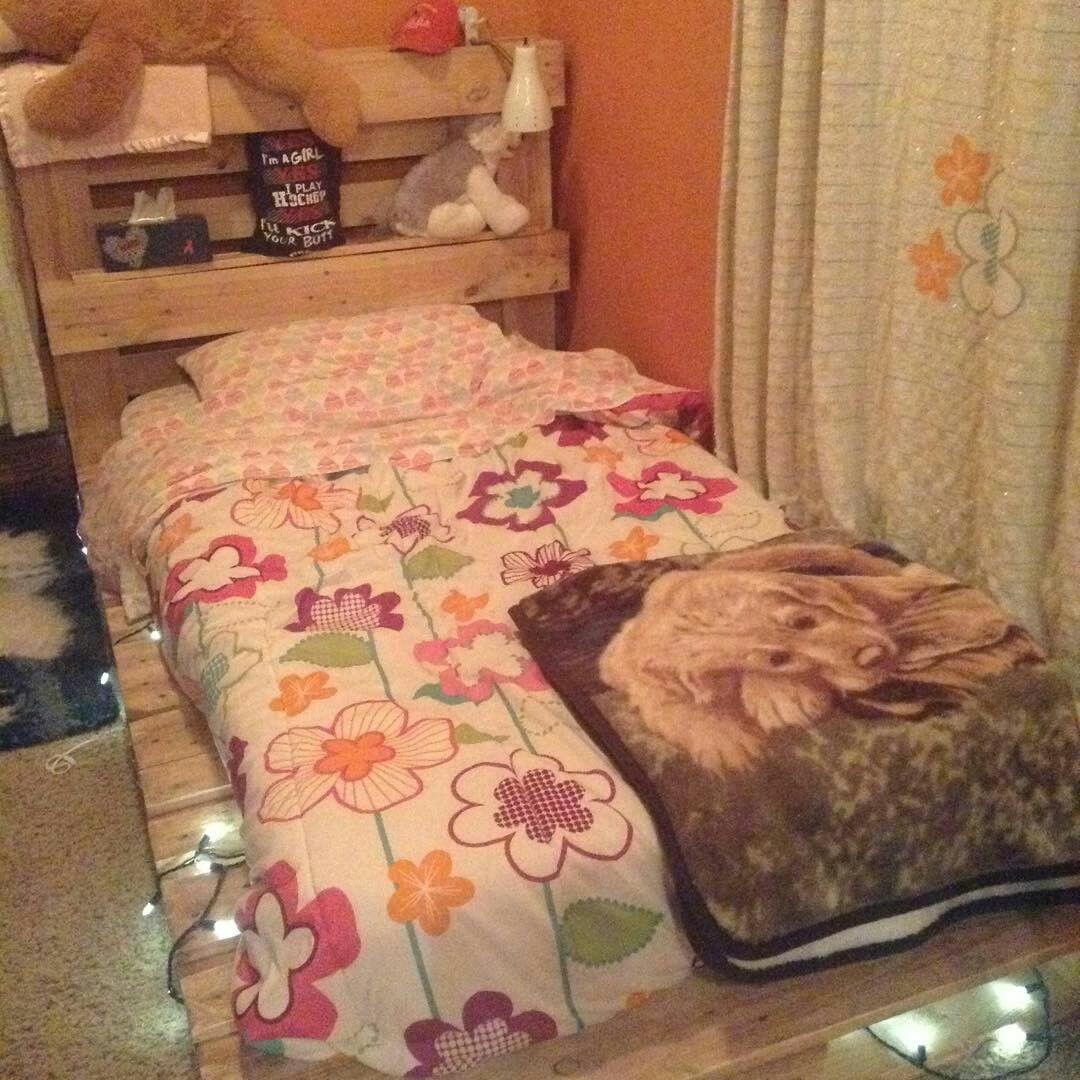
And that was it. For a few finishing touches I added a couple of scrap boards from other pallets I had laying around to the headboard to act as shelfs, and she weaved a set of old christmas lights around the base to give it some flair. Done and done.
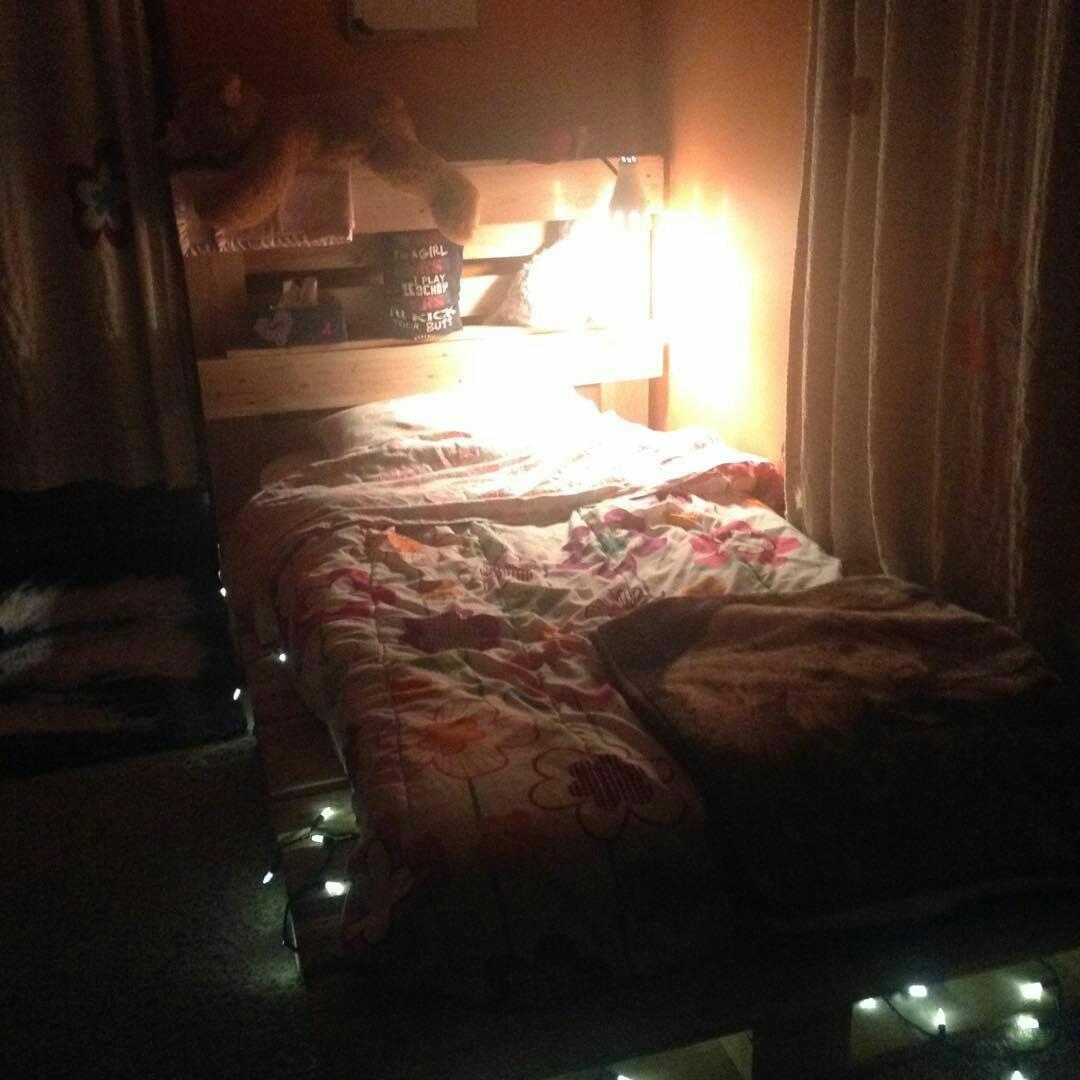
DIY Pallet Bed lights dark.jpg

What do you think? Is this something you could build for one of your kids? Let me know in the comments below what you would have done differently.

Tuesday, 8 November 2016

DIY Pallet Coat Rack

Every homeowner knows there’s no such thing as a lazy weekend at home. Honey-do-lists are never ending and once one project finishes, another magically appears to take its place.
So, beginning to get on a roll, I turned my attention to other problem areas in my home.
Our rear entry is a small landing that leads up to our kitchen, or down to our unfinished basement. There’s very little room for clutter, but the small, simple hooks we moved in with couldn’t handle everything we were throwing at it.
Now, I know coat racks are not expensive. Heck, a couple of nails in the wall will do the job. But, I had some leftover material from other projects and I wanted to do something fun and unique. So, after a quick meeting with the good people down at the internet, I came up with plans for a quirky, yet functional, homemade coat rack.
Here’s the finished product and how I made it:
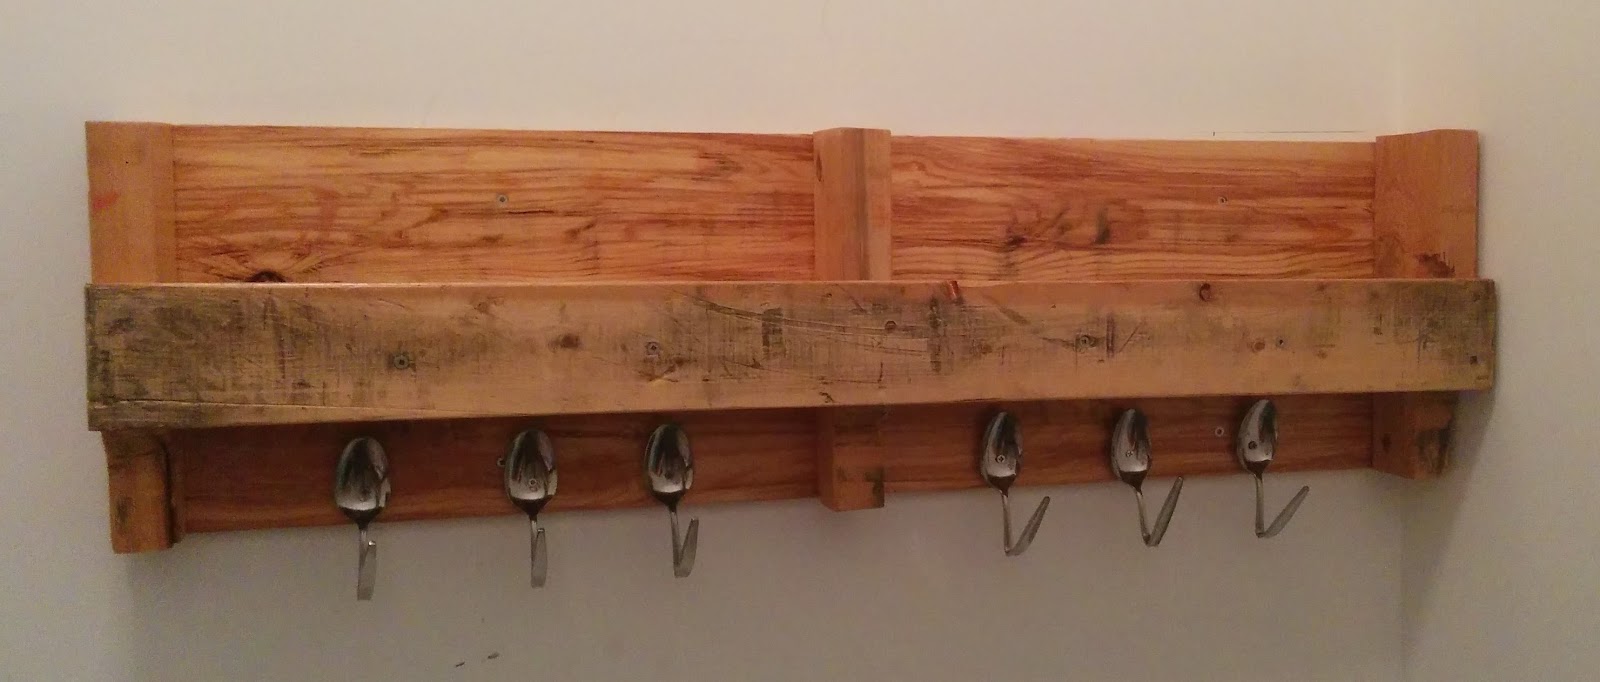
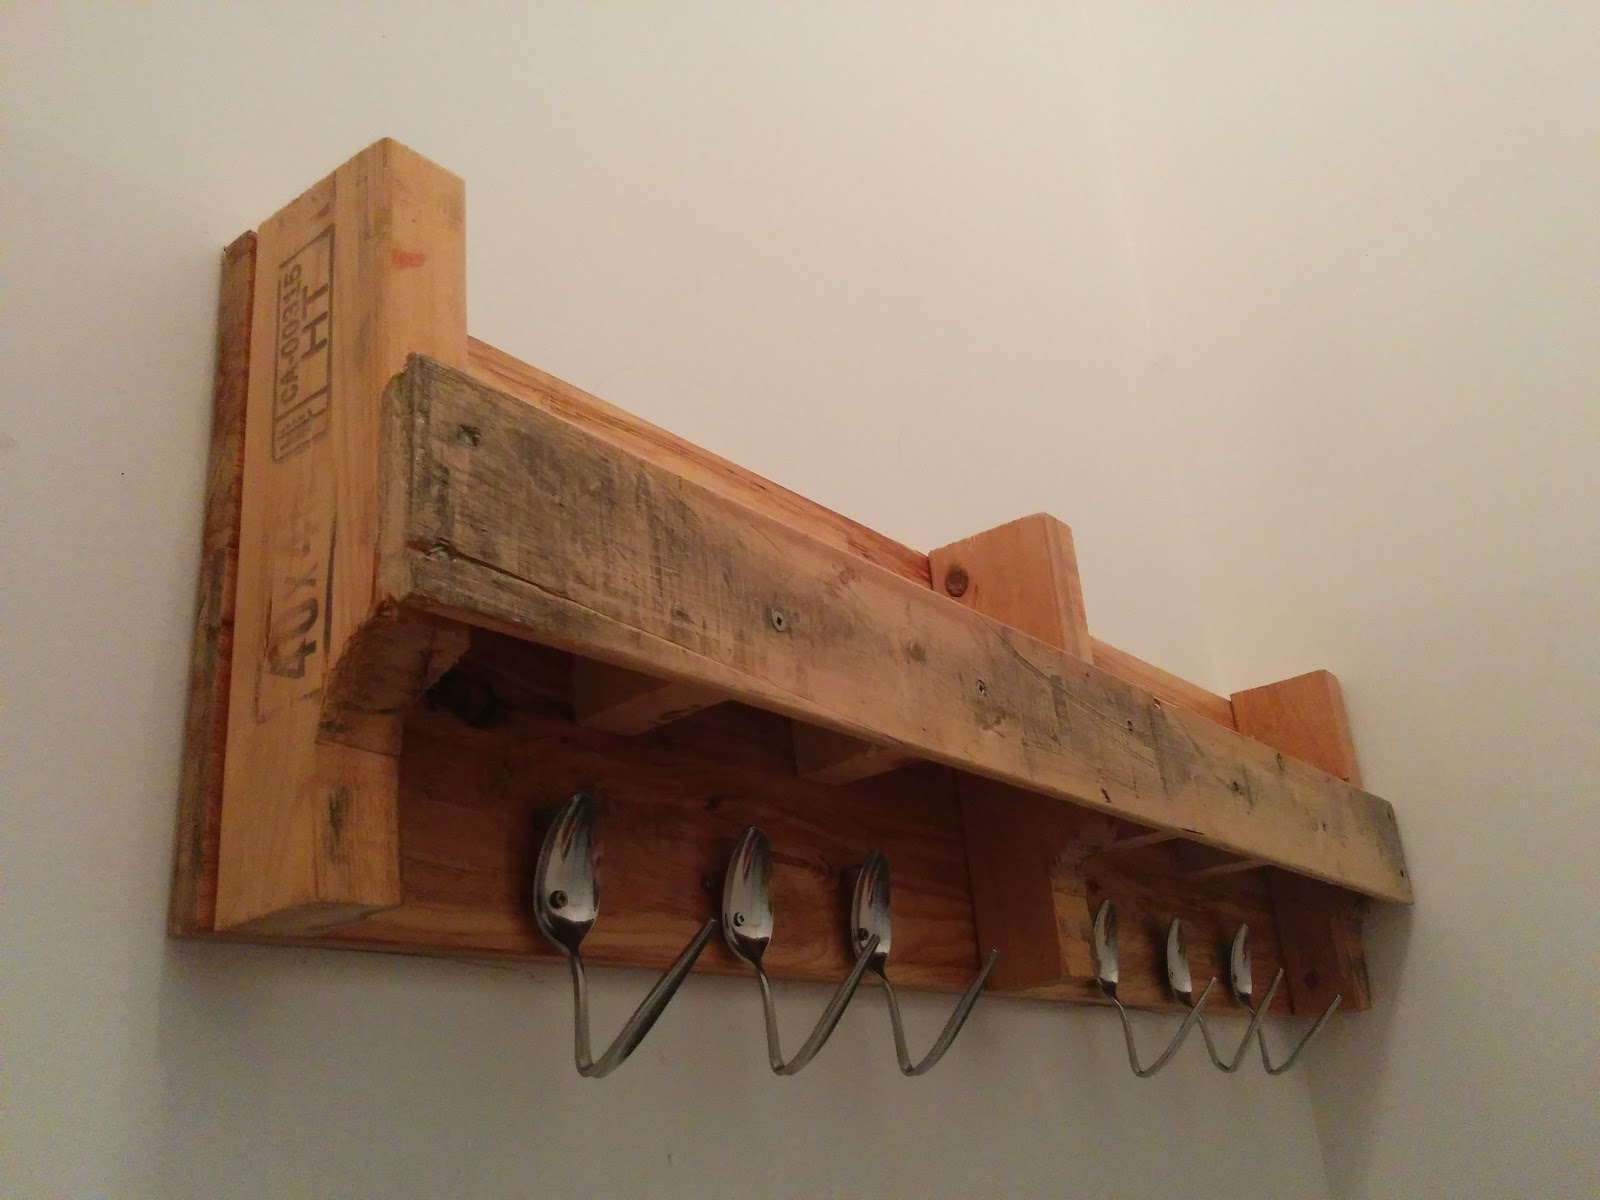
Pallet Coat Rack 2.jpg
Very simple and straightforward, yet with a little charm, too.
I used a quarter of pallet left over from my liquor rack project. I also cleaned up an extra slat I could use as a shelf. The shelf is just held in place by a few scrap 2x2 pieces.
For the fun part, I picked up a handful of spoons at the thrift store for a couple dollars. I drilled holes in the centre of the...spoon part, and then bent the handles so they could act as hooks. After that, it was just a matter of screwing everything in place.
After a quick sand and thin coat of varnish, my DIY Pallet coat rack was mounted on the wall.
Pallet Coat Rack 3.jpg

What do you think about it? Could you fit one in your home?

Thursday, 22 September 2016

DIY Captains Bed


Captains Bed 2.jpg

Having solved our dining table situation, I turned my attention towards issues in other rooms.
I love our master bedroom. It was originally the attic, but the previous owner gutted it and made it liveable.
It probably wasn’t a difficult decision as it’s naturally a great space. While it technically is only a half story, the roof has a high peak creating a high ceiling, and large windows on three sides let it plenty of light. It’s fully finished with two crawl spaces and a small walk-in closet.
All the troubles we were having revolved around the furniture we owned before moving in. We were able to tuck our long, low dresser in the closet, but due to the slanted ceilings, out highboy only fit in front of the windows - clearly not an option.
This meant I needed to get creative and see what the good people down at the internet had done.
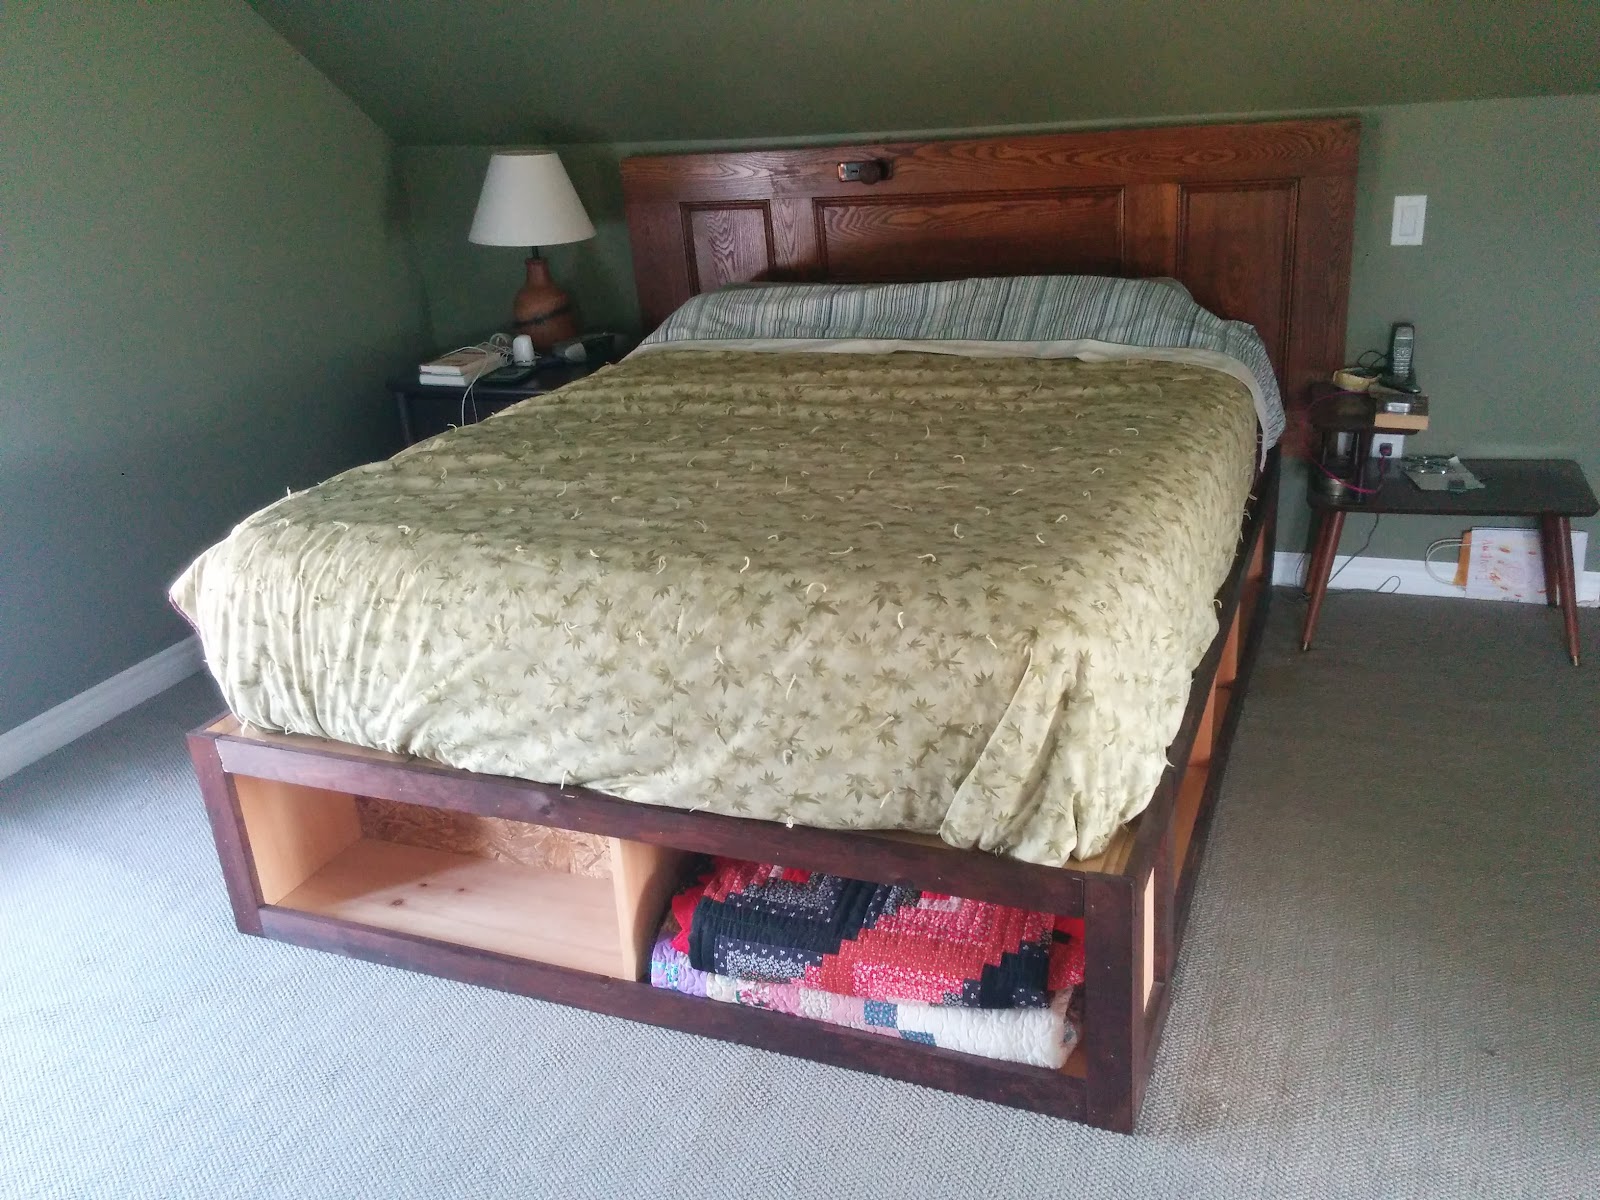
Here’s what I came up with:
Captains Bed 1.jpg
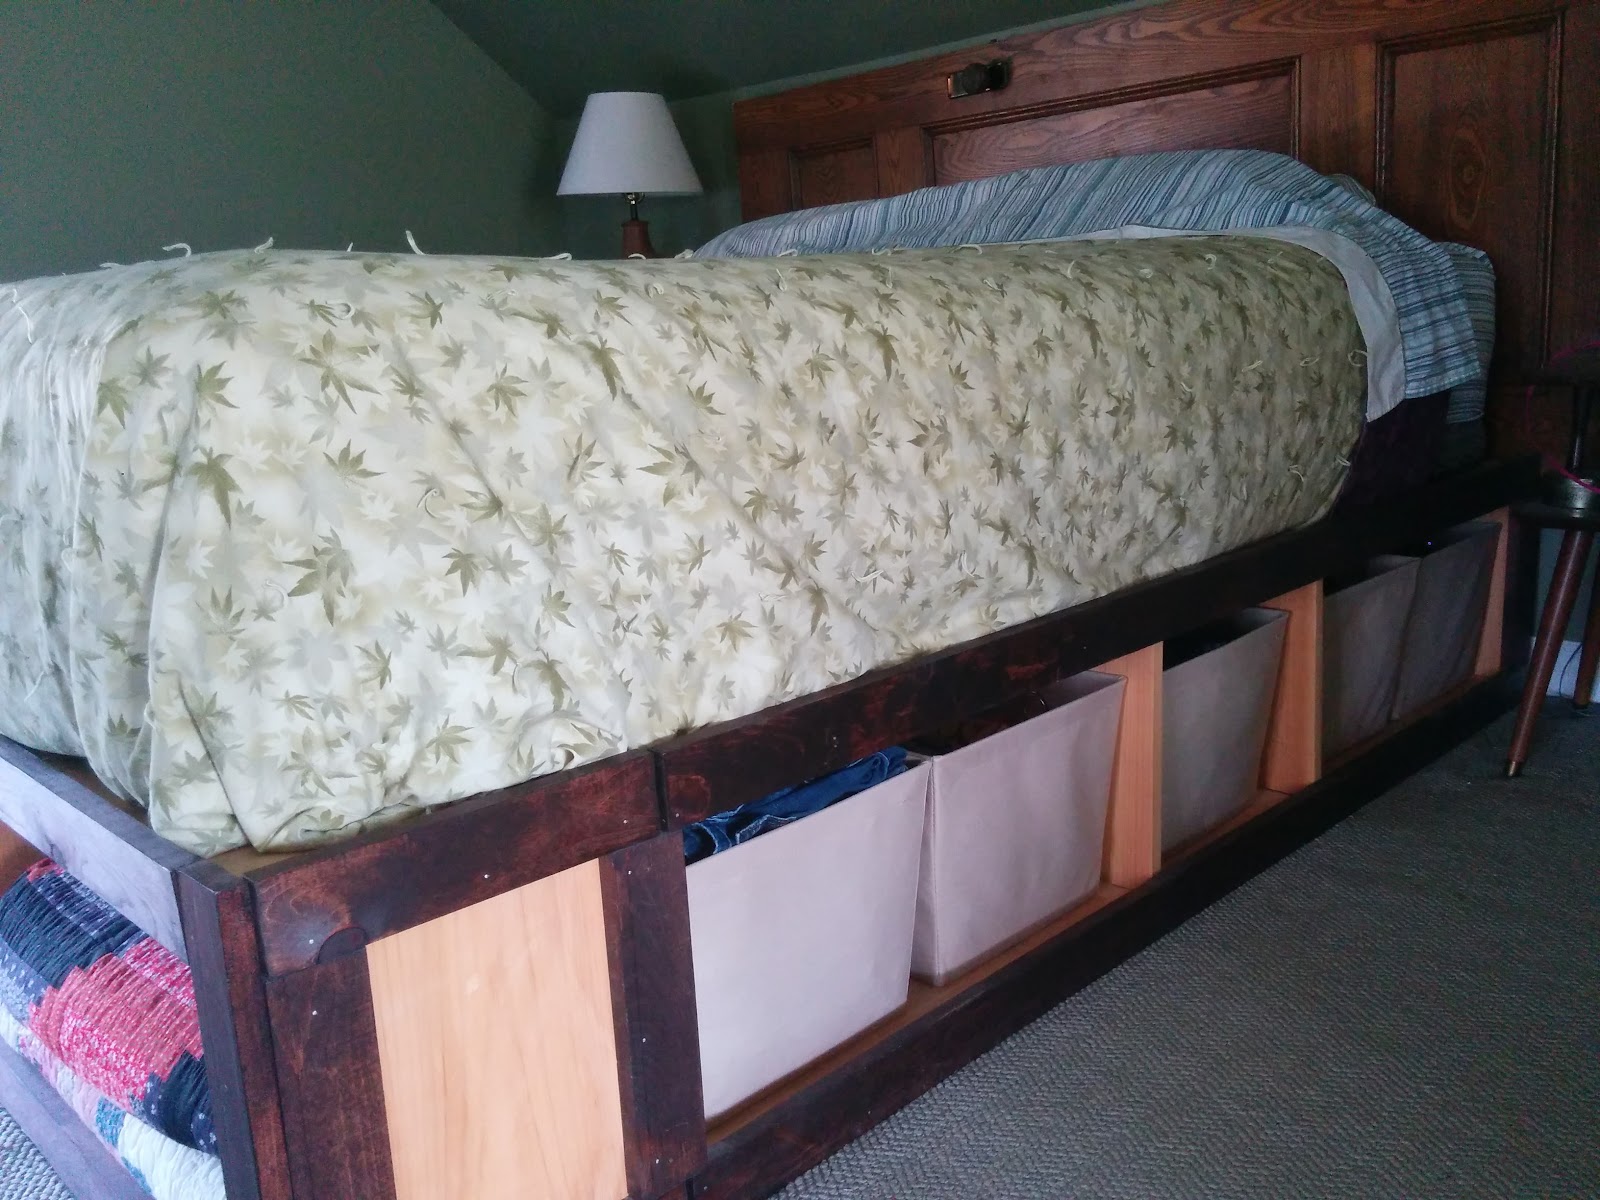
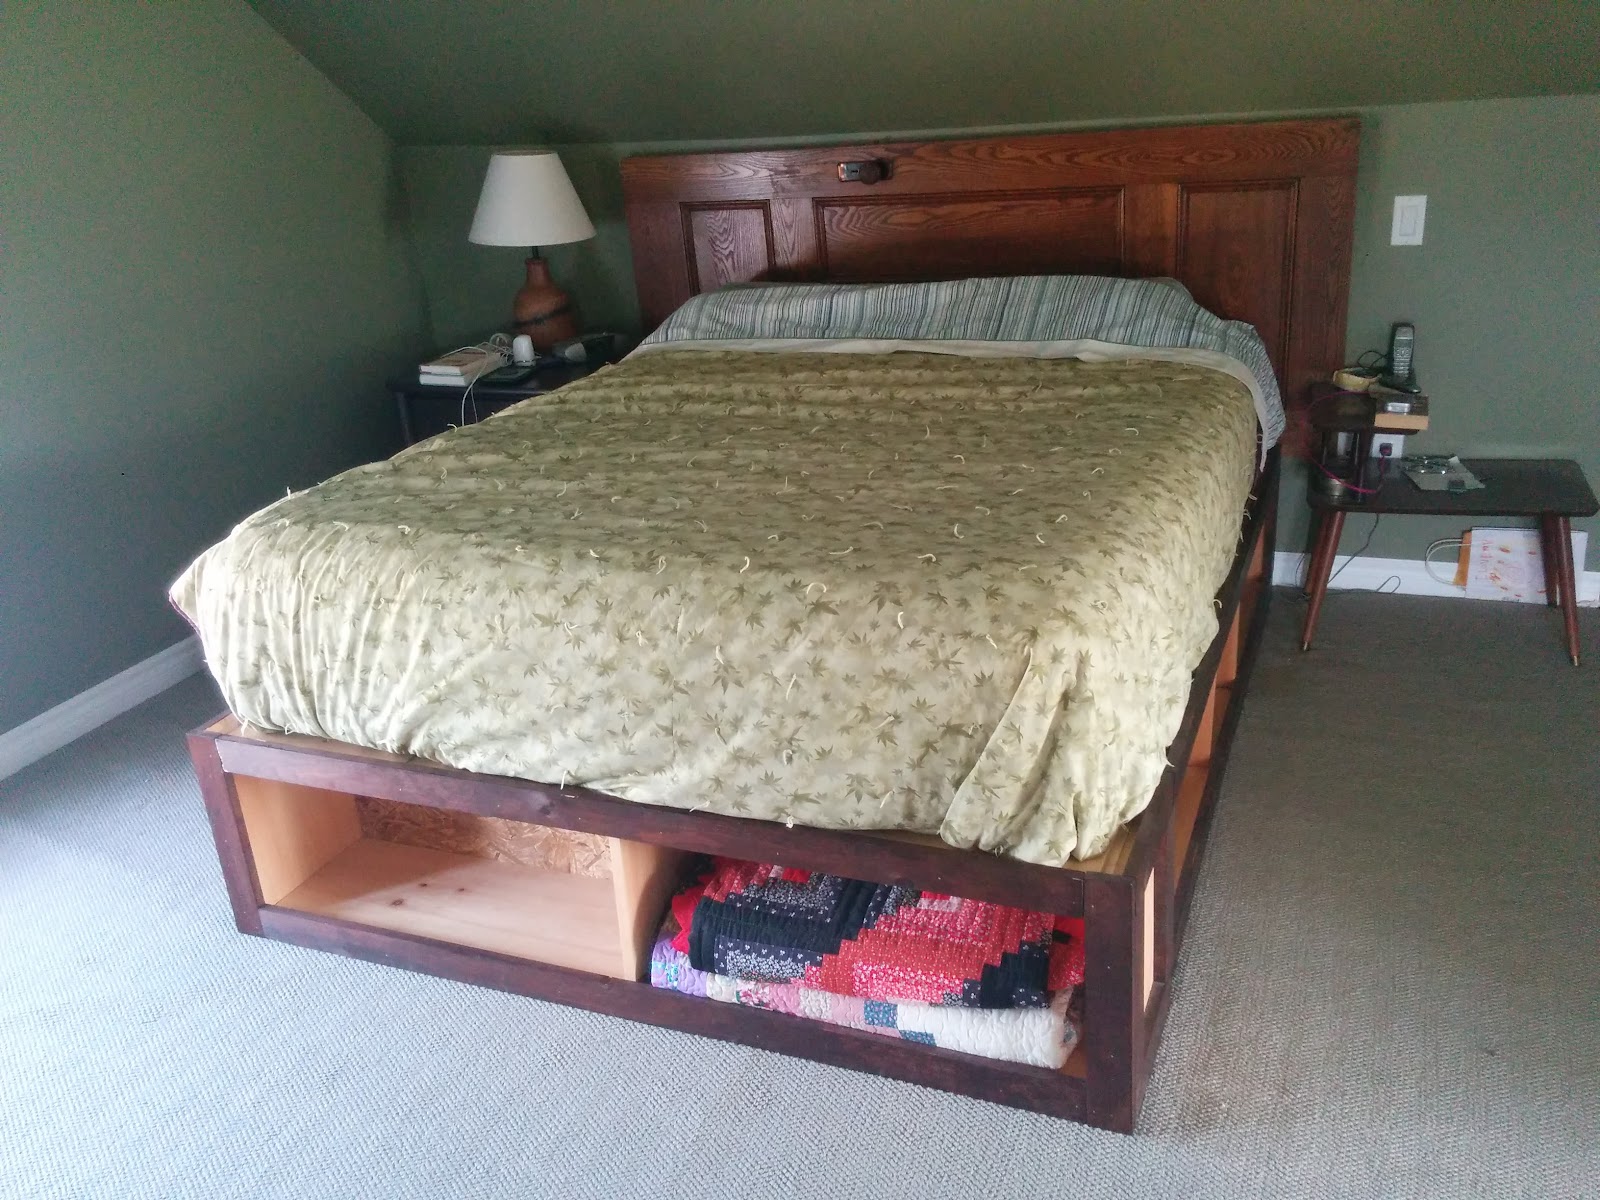
To start, I used Ana White’s plans for a full-size storage bed. I took a few measurements and made a few adjustments to make the plans work for me.
The biggest alteration I made was on the inside. Since we have a queen-size mattress, I beefed up the centre support. I had some 2x4’s laying around, so I just used them. Now I know our bed can handle any “extracurricular” activities we engage in.
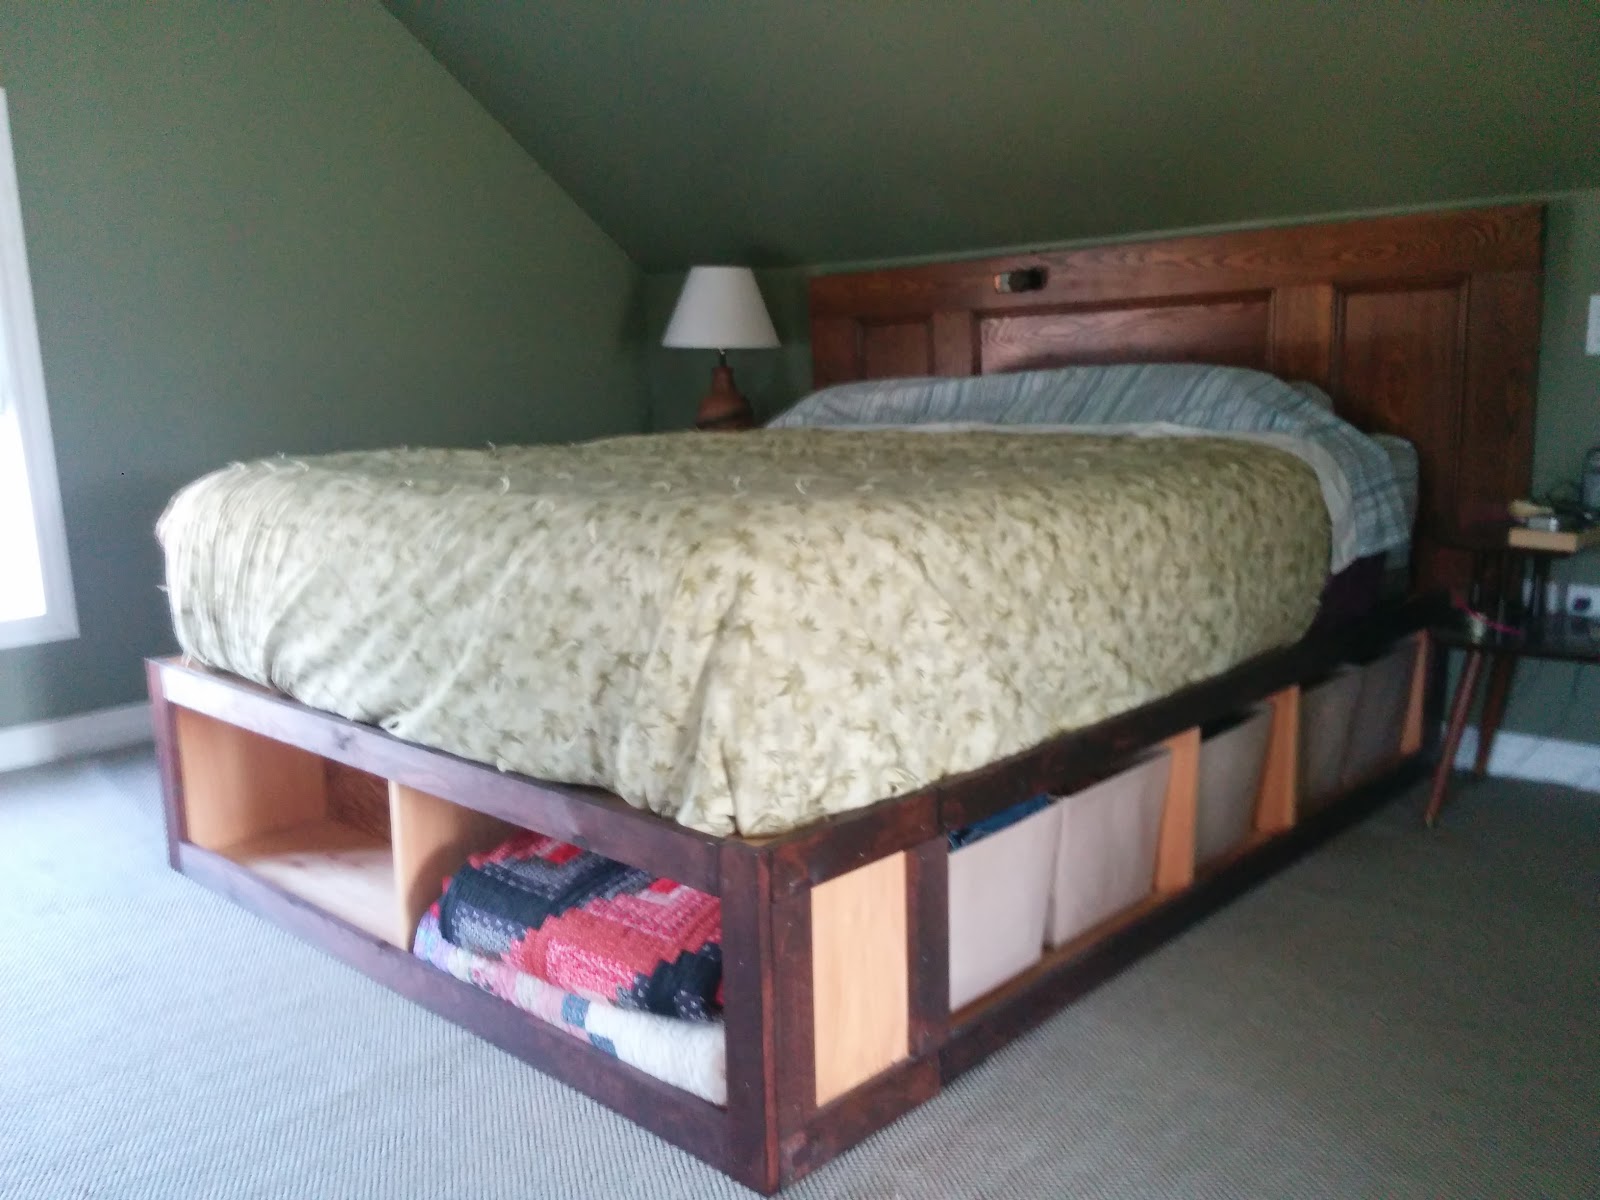
The other change was more rudimentary. I took a quick trip to Walmart and bought a few storage baskets. Knowing how big they were, I simply moved the divider on the side cubbies, and added another, so the baskets would fit nice and evenly.
With that done, it was building time. I went to my local lumber store to pick up the materials I still needed - I let them cut the plywood into the widths I needed - and was back home in no time.
Assembly was quick and easy, too. Since all I was essentially making was three boxes, I was able to do everything in my workspace in the basement and then move it all upstairs after I was completely done.
To finish off, I just stained the trim pieces to add a bit of contrast. To complete the look, I took an old door I had sitting around that was original to the house, and mounted it to the wall to act as our headboard.
Captains Bed 3.jpg
And that was that. All in all, it was a pretty quick and easy project. It may not be the prettiest bed anyone has even seen, but it is solid, easy to move, and very practical.
I use the baskets on my side to store most of my clothes. The end cubby is open and that’s where we keep extra blankets and quilts so we can quickly grab one if we wake up cold in the middle of the night. I don’t know what my wife keeps on her side, but I’m sure there’s all sorts of stuff in her boxes. (That sounded a lot dirtier than I meant it.)
Captains Bed 2.jpg

What do you think about my homemade bed? Let me know if you built one yourself in the comments below.

Tuesday, 13 September 2016

DIY Pallet Liquor Rack

Pallet Liquor Rack 1.jpg
My wife and I enjoy to imbibe, and love doing so with friends. So, we obviously are not shy about it and don’t try to hide our alcohol from anybody.
I mean, we don’t live in a time or country where we need to be ashamed of the fact that we like to have a drink or two, as long as we don’t abuse it - which we don’t.
With that being said, I quickly grew tired of the cupboard we hid our liquor in when we moved into our house. The logical place was above the refrigerator, but it is too high for my wife to even open the doors, let alone reach anything stored there. To be fair, it is also so deep that I can’t make use of more than the first eight inches or so.
I had consulted with the good people down at the internet on several occasions regarding a creative solution that would fit our decor, but it ultimately required many hours of sifting through examples until I finally found a satisfactory answer.
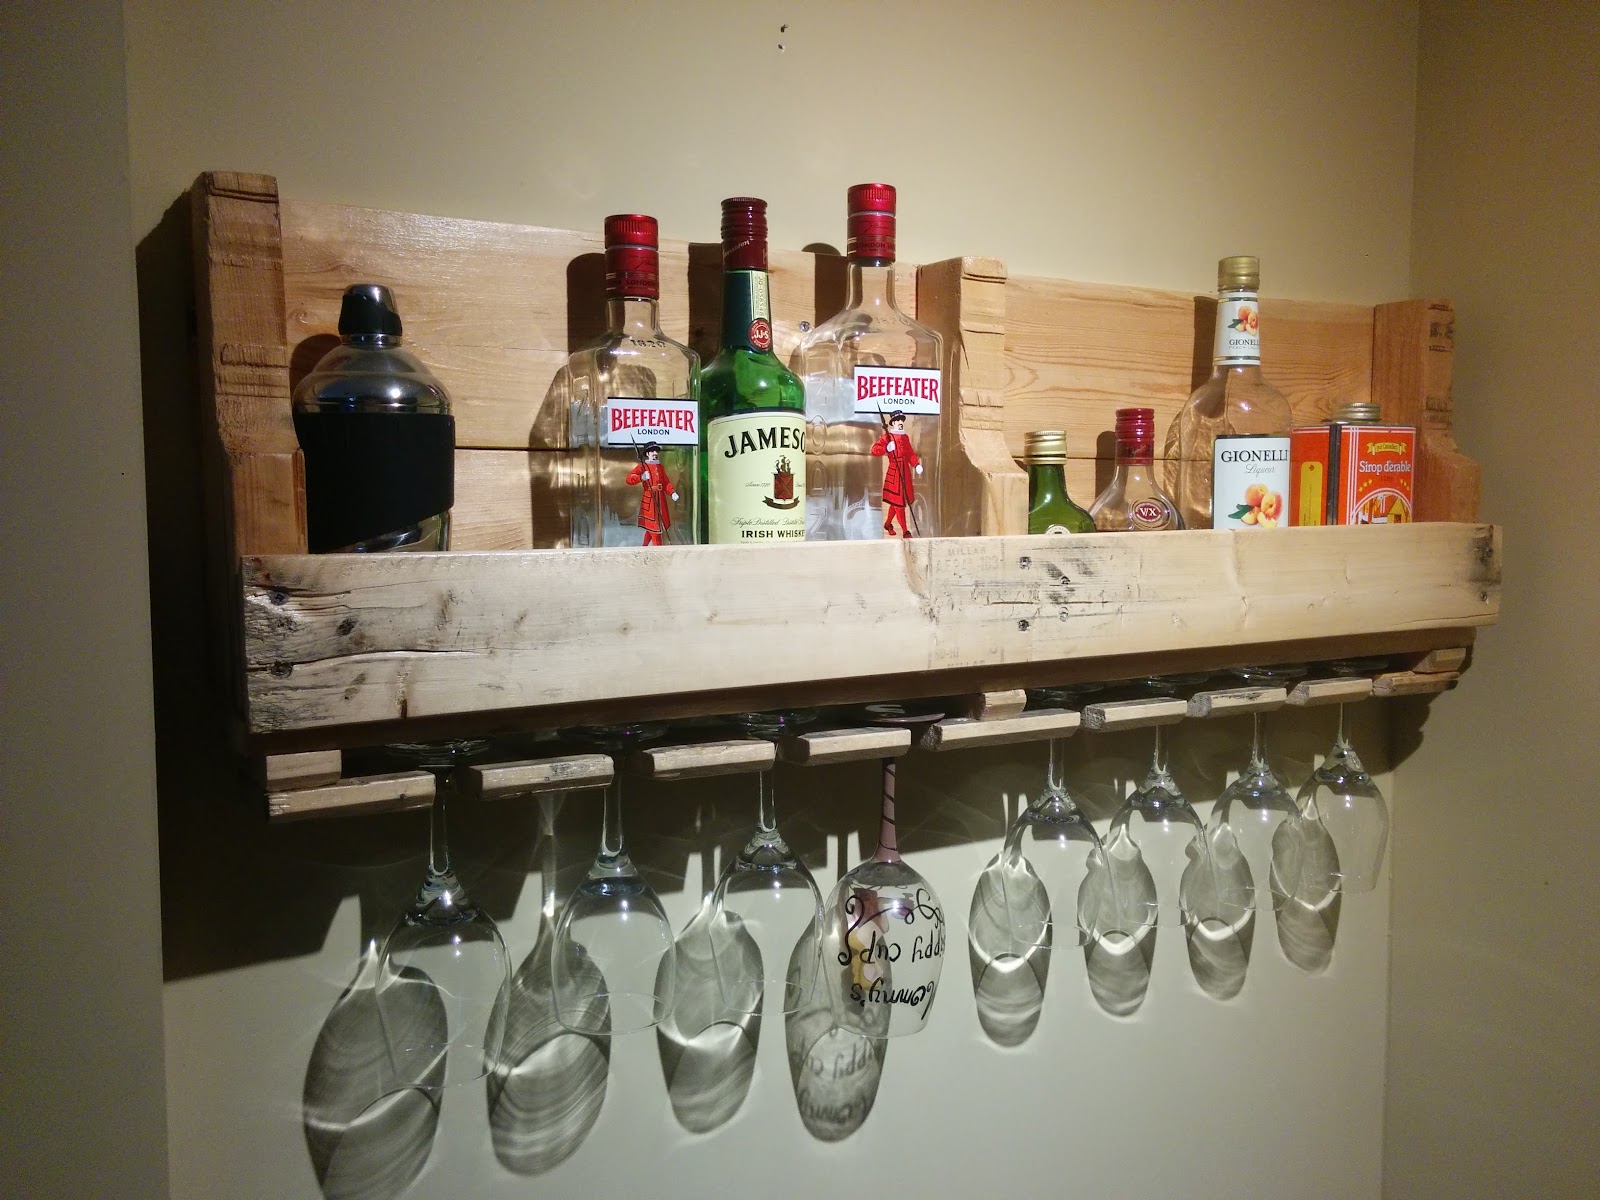
Not only did the one I like solve our problem, but it matched our rustic scheme and was cheap. Here’s what I made:
I have collected a few used pallets over the years. My neighbour loves pinterest and she and I have made a few projects using old pallets. Therefore, I have a few left over bits sitting in my basement.
Needing only a quarter of a pallet, I selected one that was in the best shape, and cut off the rest.
Then, I pulled two lengths of good wood off the part I had no plans for. I took one and decided how many of our wine glasses I thought I could reasonably hang from it.
Next was the most difficult part of the project - and it would have been quite easy if I had actually measured something. I just guessed at how wide the slots needed to be and drilled holes to get them started. It was simple to cut from the edge in to allow a glass stem to slide in.
However, our wine glasses have a very fat base, and didn’t fit in the gap I made. This meant I had to cut them wider after I thought I was finished everything, but in the end, it still wasn’t that difficult.
To create a space between the base of the shelf and my wine glass hanger, I simply cut some scrap in three 1-inch pieces. With this done, I sandwiched them between the hanger piece and the smooth, solid length and screwed them to the base of the pallet.
And that’s it.
I gave it a good sanding, and a light varnish, and it was ready to hang on the wall. While it’s only a portion of a whole pallet, it is still fairly heavy. I obviously located a pair of studs and used four good screws to secure it to the wall.
Pallet Liquor Rack 1.jpg
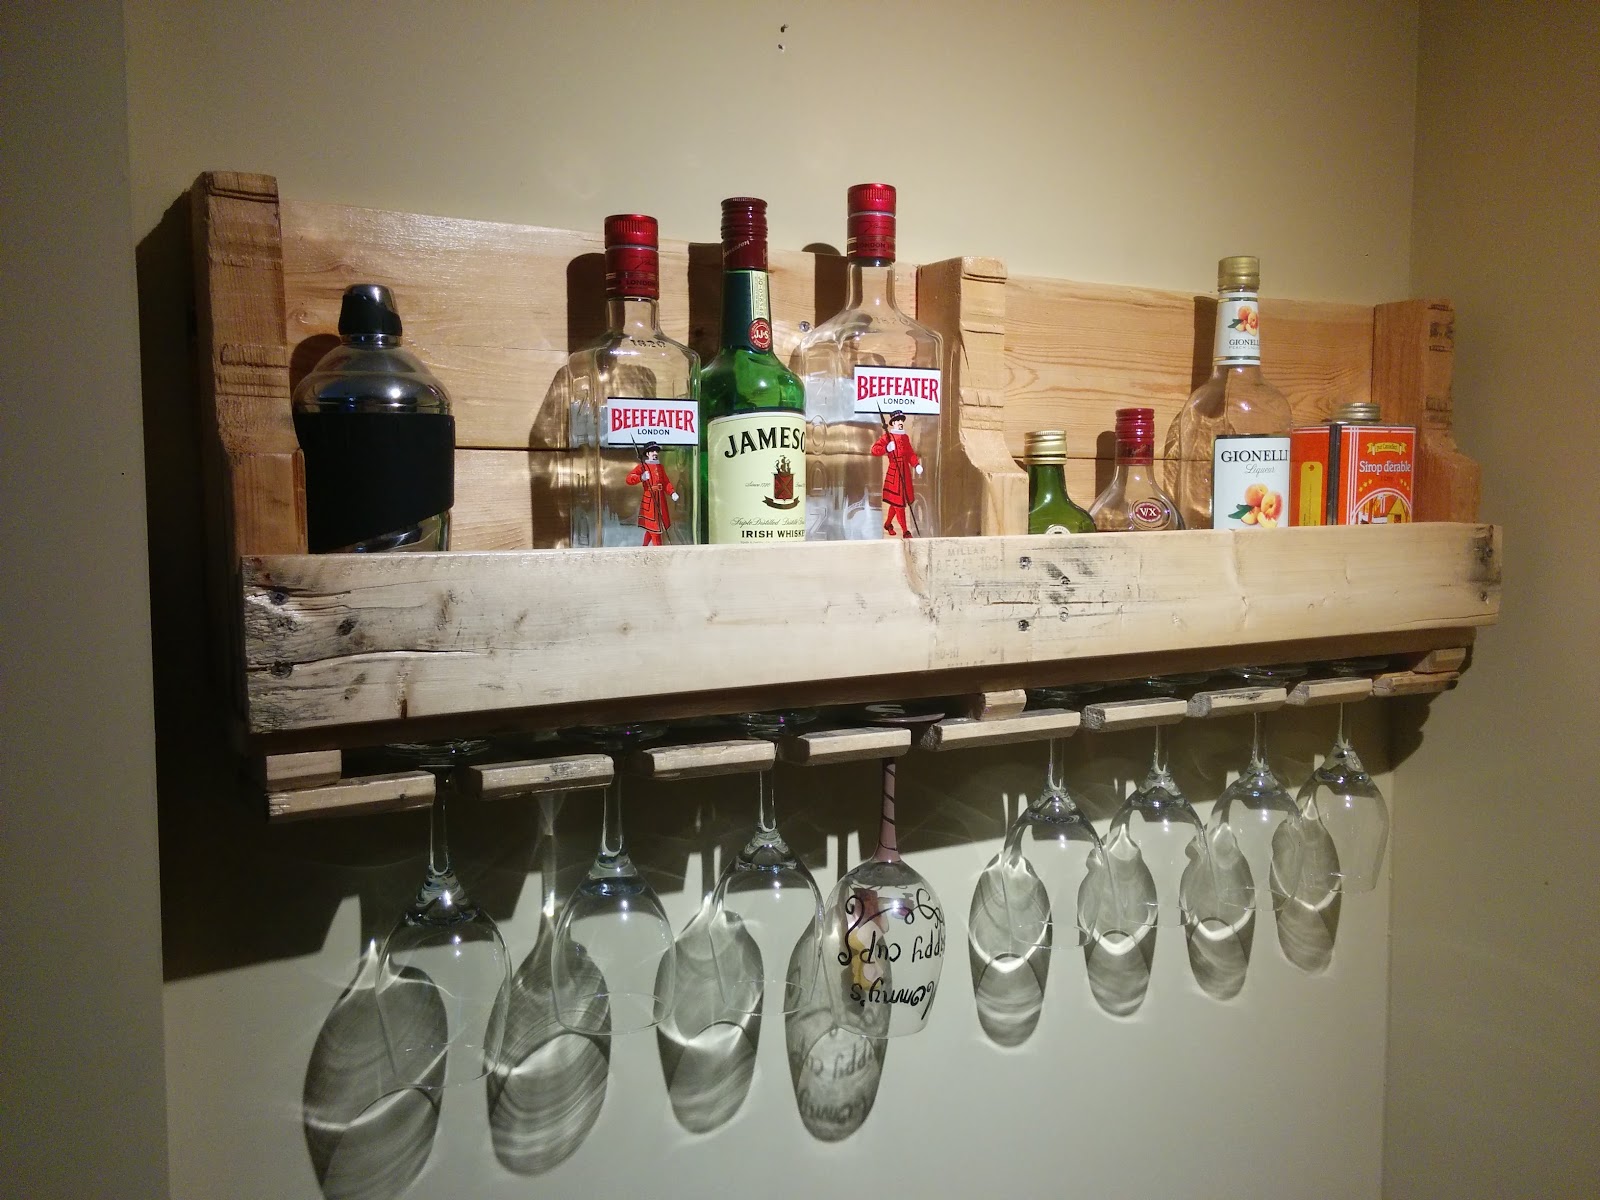
Standard size liquor bottles fit perfectly (as do empty maple syrup cans apparently). It allows for a quick visual inventory, and glasses are always within reach.
I’m happy with how it looks and it would have only taken me about an hour to make if I had measured properly and actually focused on what I was doing.

Is this a project you could see yourself doing? Tell me what you think in the comments below.

Monday, 25 July 2016

DIY Dining Table

A few years ago, my wife and I bought our first home. We didn’t have a lot of money and were expecting to buy a fixer-upper like a lot of people do with their first house purchase.
After looking at a few that just didn’t work for one reason or another, we asked our realtor to show us a house that we knew was a little out of our price range. Big mistake - the house was perfect!
A century home that the previous owner had completely gutted and renovated up to modern standards. But, here’s what really got us: he kept and reused all the original trim, thus retaining all the charm of an older home without any of the hassles.
After talking (read: beg, plead, grovel) to our parents and having a close look at our finances, we decided to make an offer. It was below the asking price, so we weren’t too hopeful. However, as it turned out, I went to highschool with the owner and he was willing to negotiate.
To our delight, instead of buying a starter house, we were moving into our dream home!
While that was great and all, we were now officially poor.
After living with our tacky, old, and sometimes broken, furniture for a while, I decide to figure out if I could make some items that would be cheap, yet a lot less embarrassing. After consulting with the good people down at the internet, I learned that I could.
The first piece I decided to replace was our dining room table. Here’s what I did:
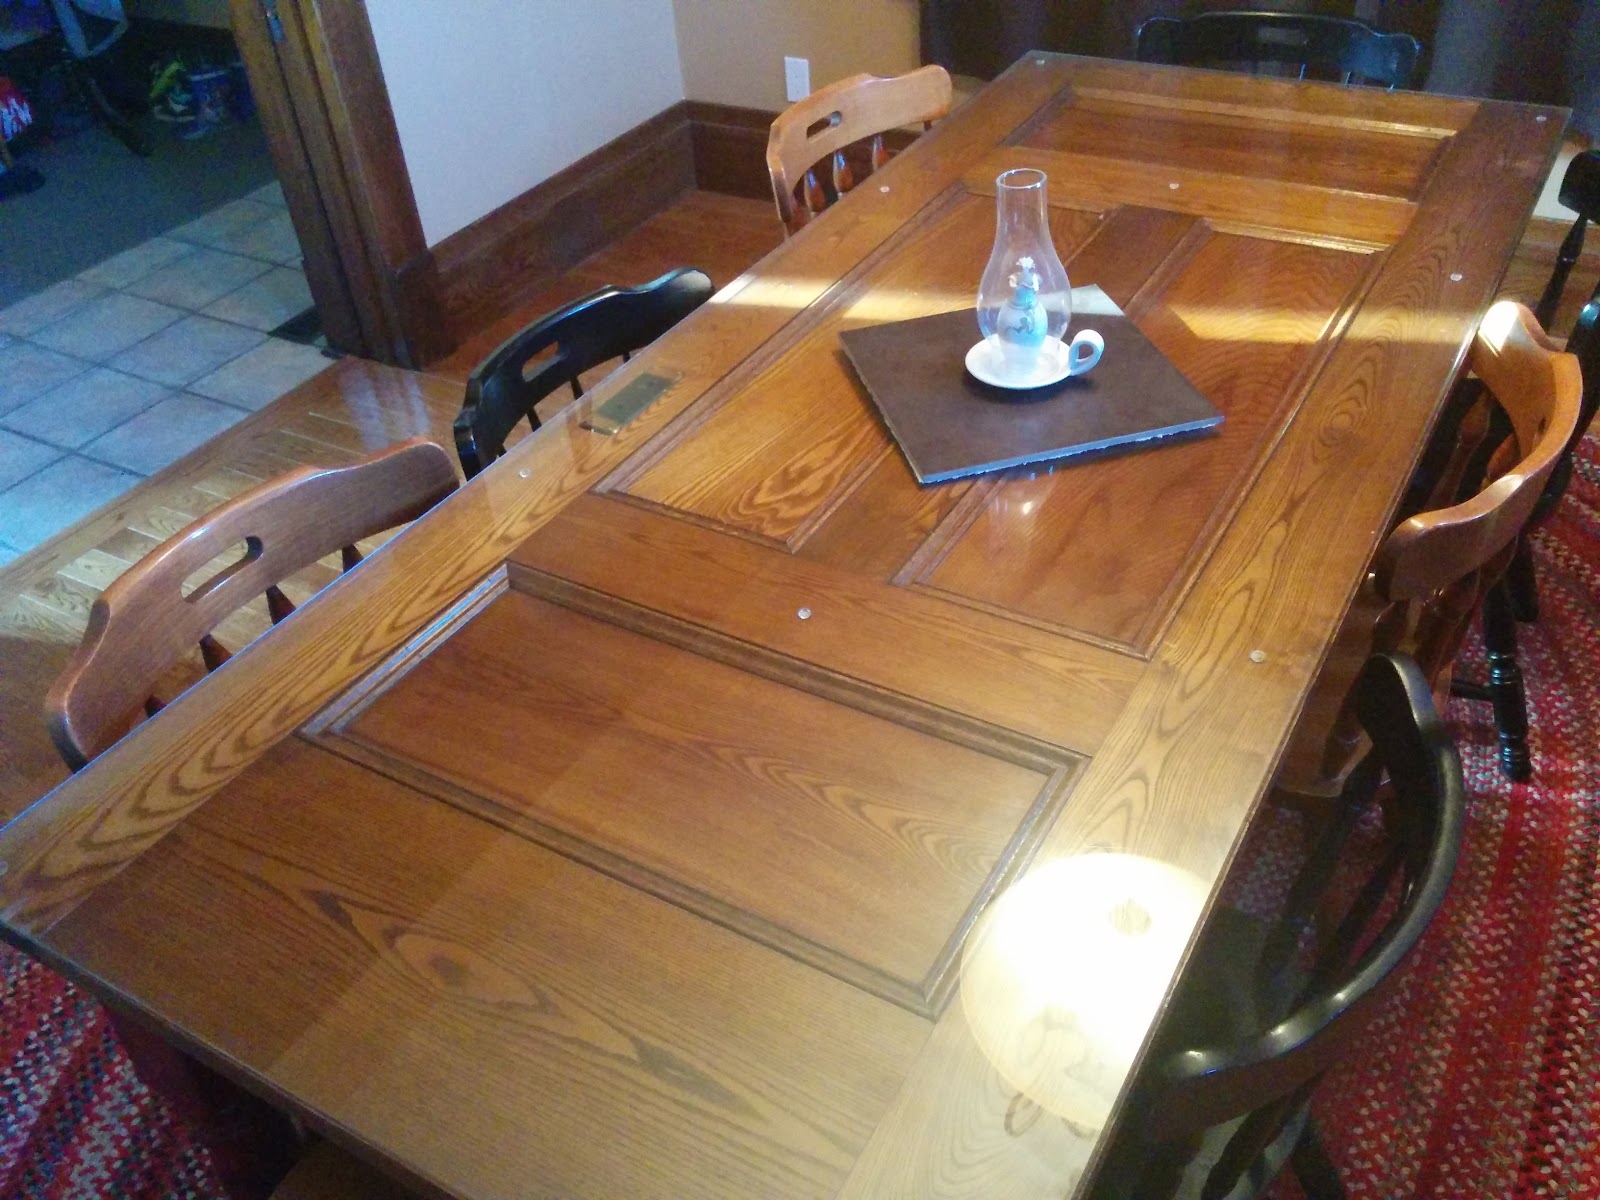
Dining Table top.jpg
Since I didn’t have many tools at the time, and even fewer skills, I kept the project as simple and straight-forward as possible.
As, mentioned, the previous home-owner reused as much of the original character pieces as possible, and that included the doors. However, the renovation involved the removal of a few walls to create more open areas. As buyers, we loved that, and as an owner, I appreciated that he kept the doors that were not reused.
I picked my favourite, and took some measurements. After a quick trip to my local glass shop, I had a piece of ¼-inch glass on order.
While I waited for my glass-top to arrive, I focused on figuring out how to suspend it above the floor. I was told about the Habitat for Humanity ReStore and paid them a visit to see what I could find.
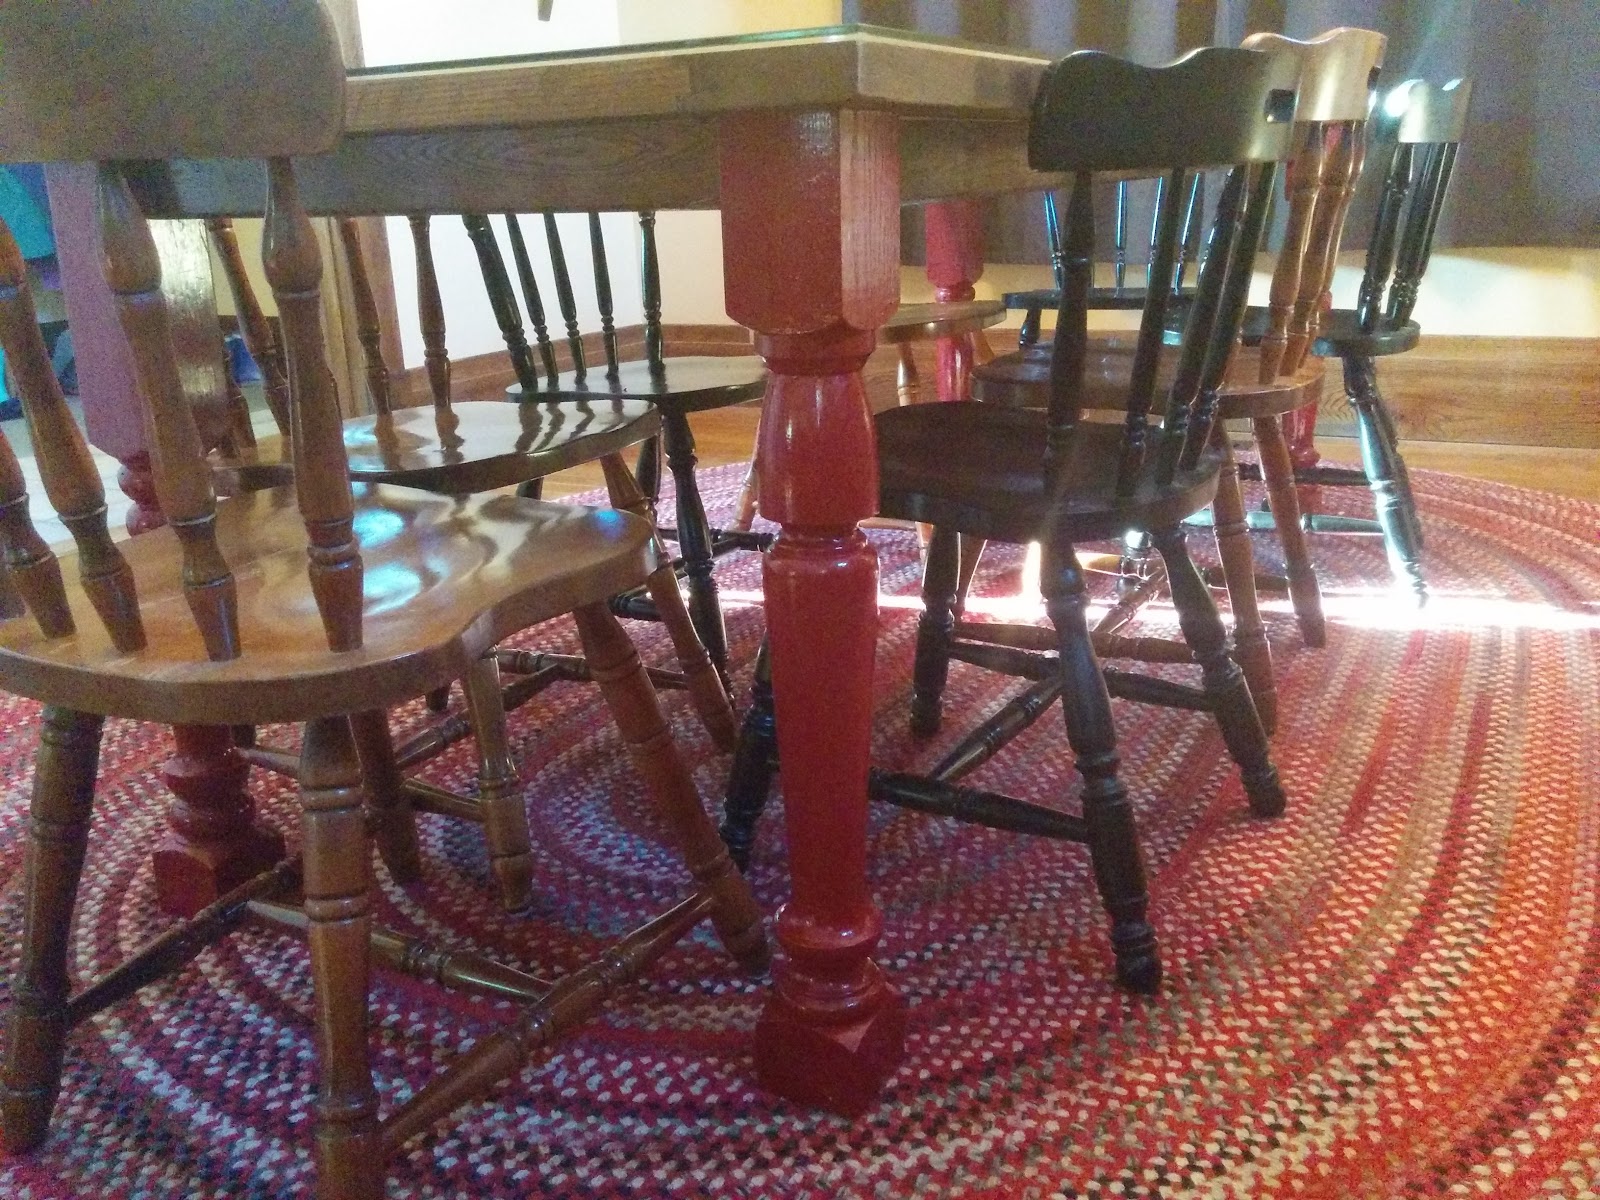
Dining Table legs.jpg
What I came home with were 4 mismatched, unused banister newel posts. They were plenty long and strong enough, and I liked that they didn’t match as it would add to the character. My wife decided that red would be our accent colour, so after cutting them all the same length, I bought a can of red spray paint to finish them off.
I found a long piece of 1-inch diameter dowel in amongst the other materials, so I cut a few pieces off to use as pegs to attach the legs. I also bought several small L-brackets at my local hardware store to add further stability.
To hide the hardware, I used a piece of baseboard trim. The house has beautiful wide hardwood baseboards, and the previous owner had purchased some newer replicate trim which he ended up not needing. I chose one of the newer pieces as to not ruin an original.
When the glass I had ordered came in, I assembled the table. All-in-all, it went together quite easily and all the tools I needed were a handsaw and an electric drill. I used a little sandpaper by hand to clean up my cuts, but other than that there was little else I needed to do.
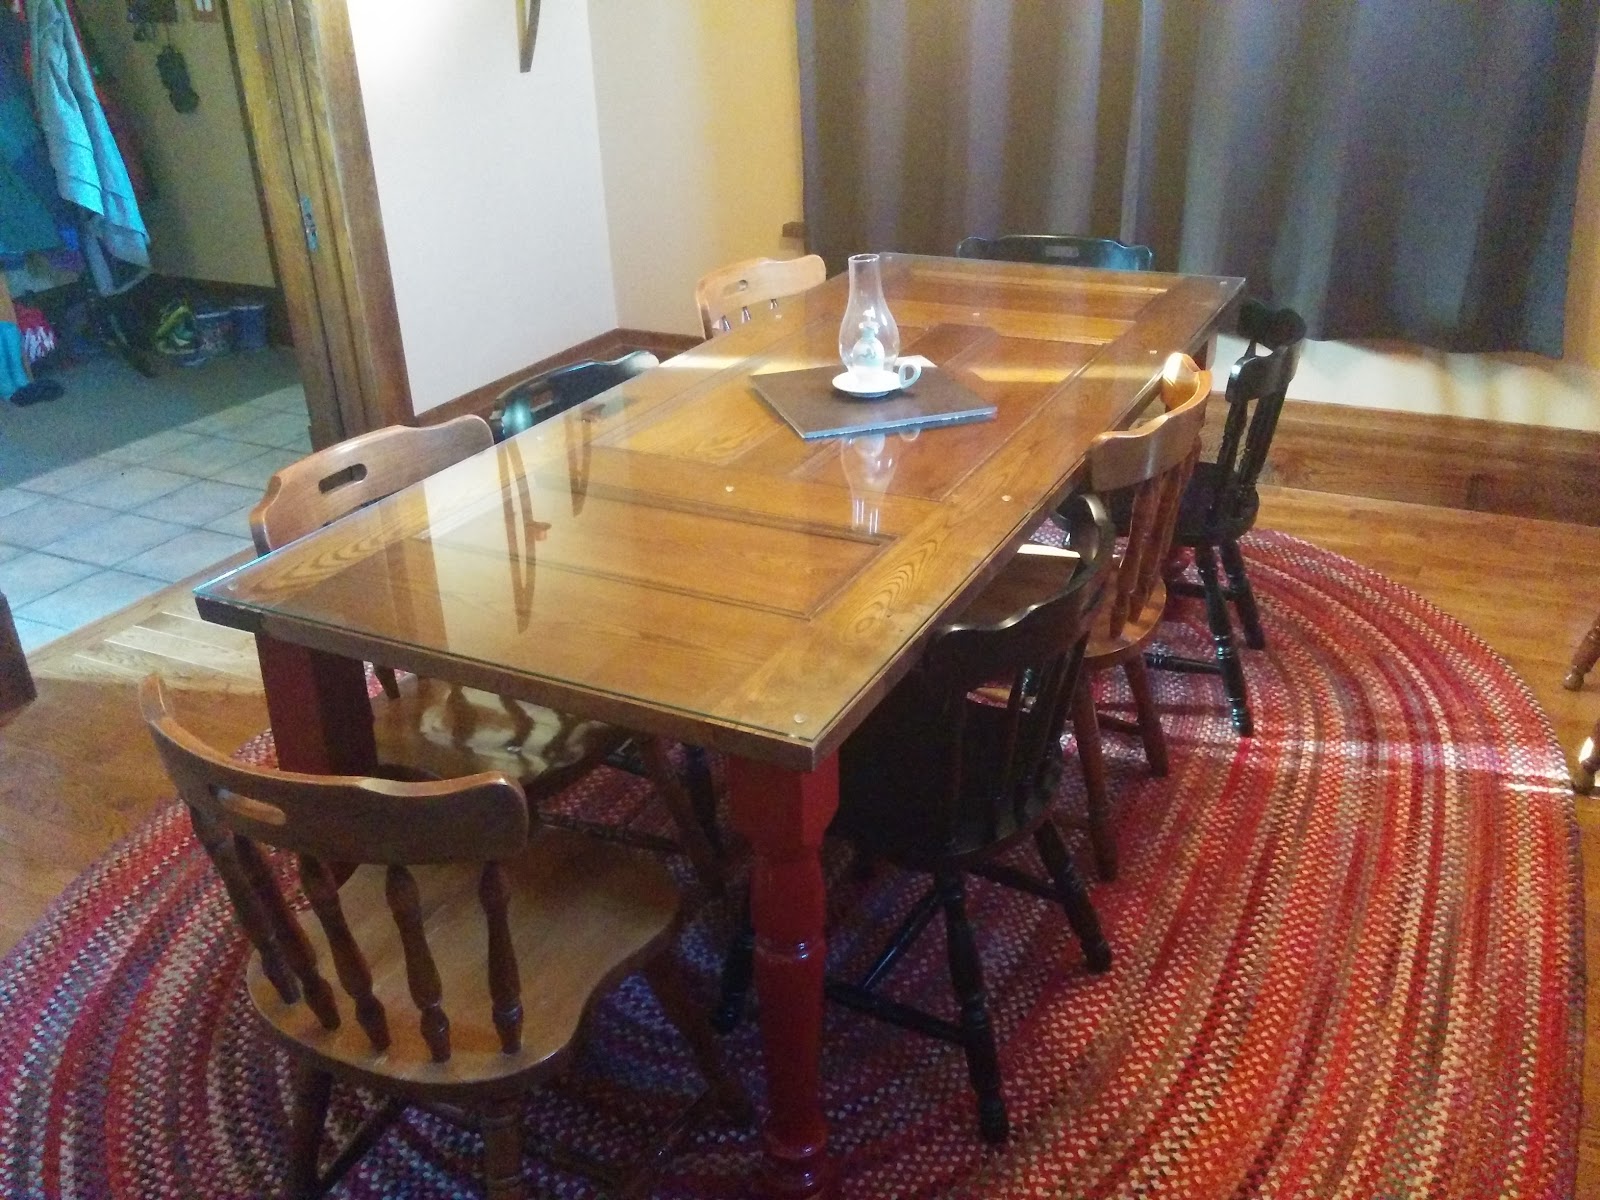
Dining Table finished product.jpg
I’m pretty happy with how it turned out. It’s not something you would see somewhere fancy, but it can comfortably seat 8, matches the style of our house, and is unique.

What do you think about my dining table? Have you done something similar in your house? Let me know in the comments below.