
Since I’ve turned 30, I’ve found it takes a lot longer to recover after playing recreational sports. After a game of beer league hockey a few years ago, my body felt shattered and it took several days to feel normal again. I finally conceded that I needed to add a workout to my daily routine.
I have 2 young children and I hate running. So, I wanted a workout that fit into my current routine and didn’t require me to leave my kids home alone. After consulting with the good people down at the internet, I learnt that the TRX suspension trainer was a great full-body home gym that takes up very little space.
While the TRX is not the cheapest piece of equipment on the market, for a full-body gym it’s pretty good. However, I don’t have any money, so I found a way to make my own for a lot less.
Note: This setup works for me. I assume zero responsibility if you attempt to do something similar, and something goes wrong. Be mindful of the weight ratings of each piece of equipment you use, and use common sense to keep yourself safe.
This project was actually so easy and cheap, I made 2 - 1 for me mounted in my bedroom, and another for my kids mounted in the basement. The materials are also quite easy to find.
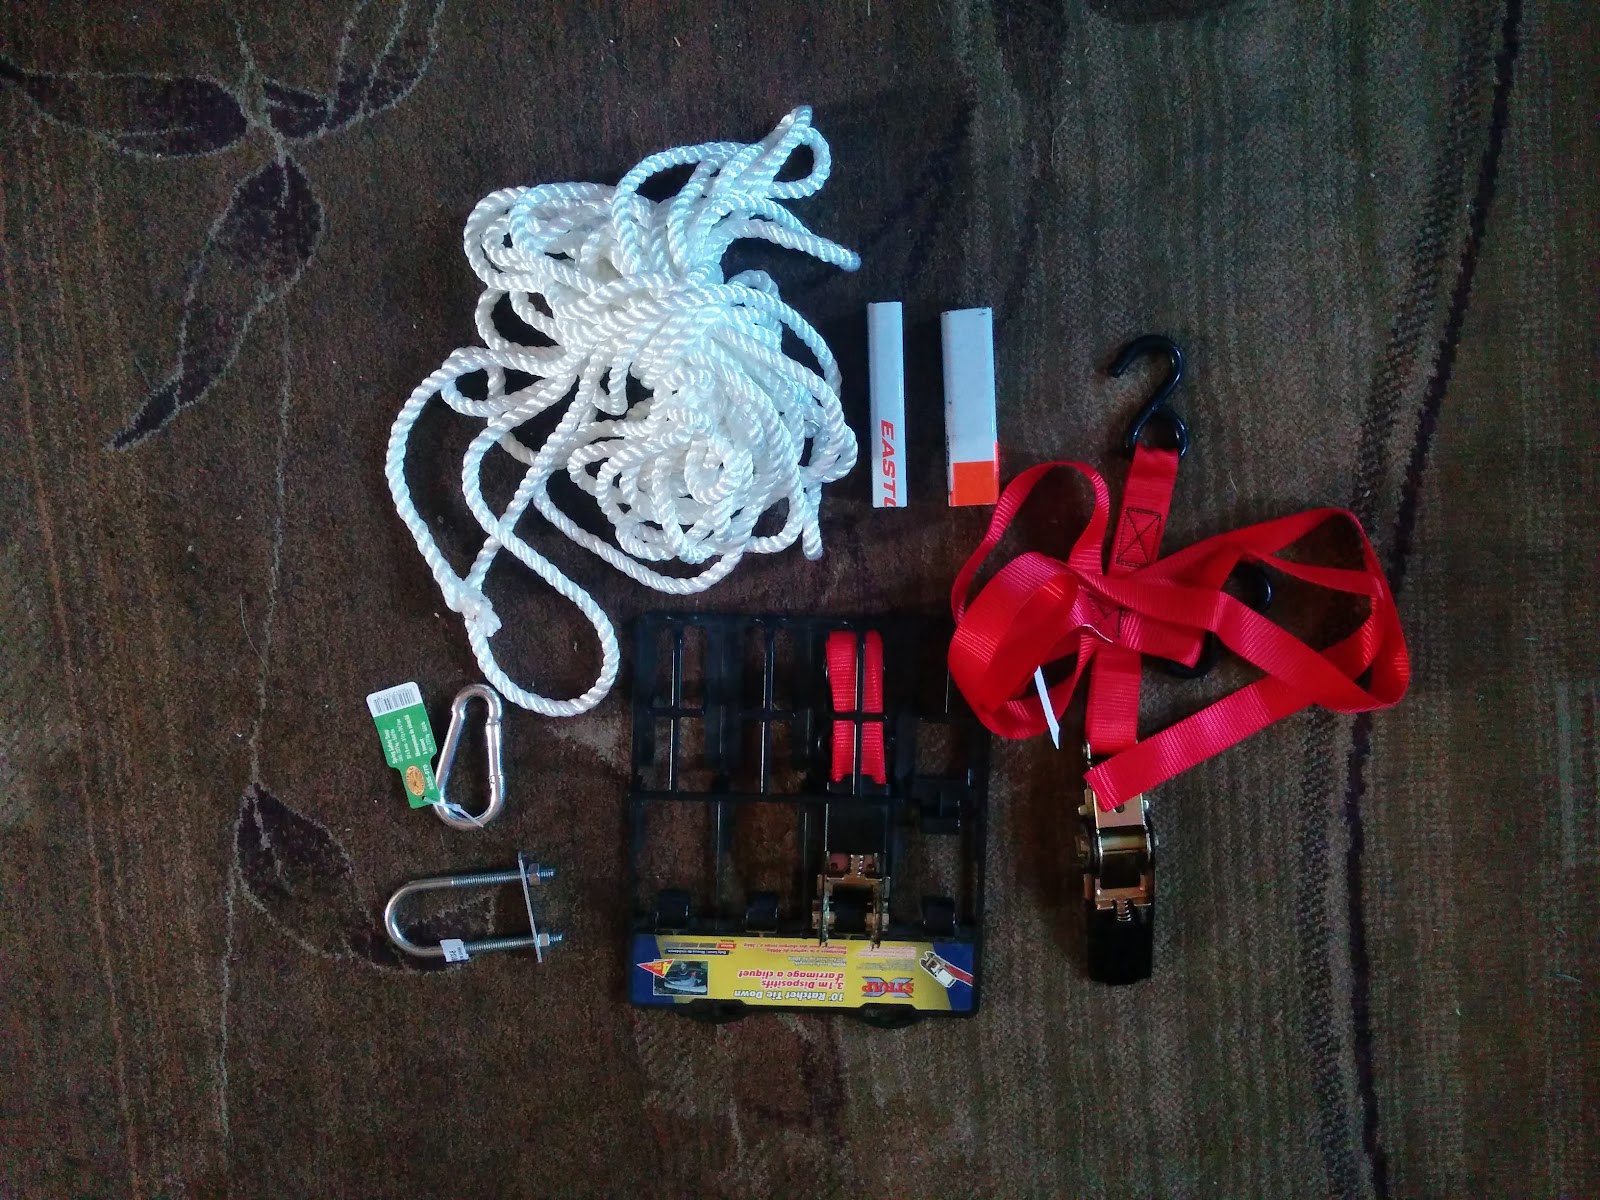
The most important items are the lashing straps. These not only make up the bulk of the suspension trainer, but they also need to be able to hold your weight. You can buy cheap ones at any hardware store that will work, but I was lucky and my wife found a brand new 4-pack of quality straps at a yard sale for $10.
The next major item is the rope. Climbing rope would be ideal, but again, I was going the cheap route. I bought the cheapest rope that I felt had a safe breaking strength, which in my case was 800 lbs. As you can see, it was far longer than I needed, so after making both trainers we now have a strong, new clothes line.
As for handles, for mine I reused a pair of handles from an old skipping rope. They are nice and thick and have a formed rubber coating making them perfect. For the one I made for my kids, I cut a broken hockey stick shaft in 3 inch lengths. Since they will be using the suspension trainer mainly to stay in shape during the hockey off-season, this felt fitting. You could also use PVC pipe, or anything reasonably strong and feels good in your hand.
To connect the straps together, I used a large carabiner. Strong, simple, and allows me to take the trainer down and put it back up quick and easy. Not much else needs to be said.
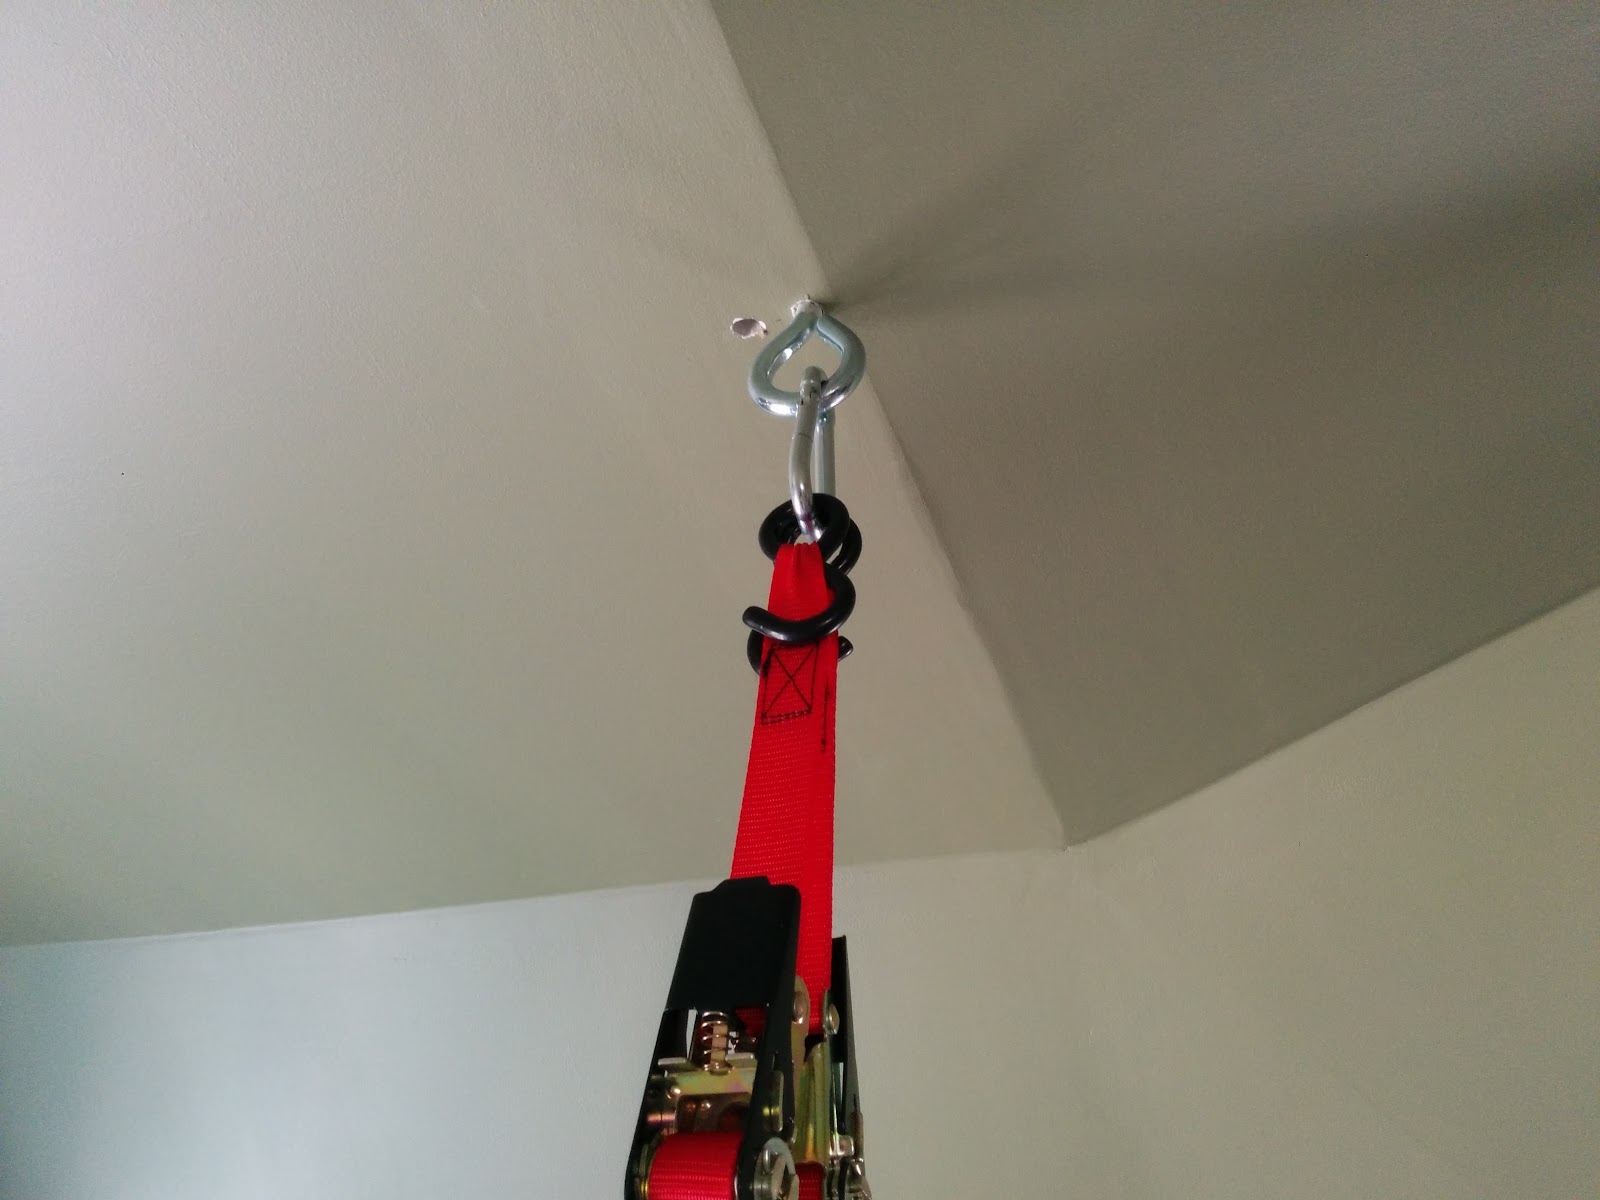
To mount it to the ceiling in my bedroom, I bought a large screw eye bolt. I will admit, this is the scariest point of my setup, but as it is a finished ceiling I didn’t want to rip a large hole to use a more secure method. (You may notice the extra hole. My stud finder lied to me.) However, after a few months of use, the screw hasn’t moved or come loose at all, and I do check it periodically. Here’s hoping that continues.

Since we have an unfinished basement, it was easy to mount the second trainer and make it solid. There is no way my kids will pull it down on themselves.
Putting it all together to make it look and work like a proper suspension trainer is also super easy. I basically followed this YouTube tutorial:
To start, I decided how long I needed the lashing straps to be. I gave myself lots of extra length, and while the plan was to not cut them, I had to take off a couple feet or I would not have been able to ever shorten the trainer if I wanted.
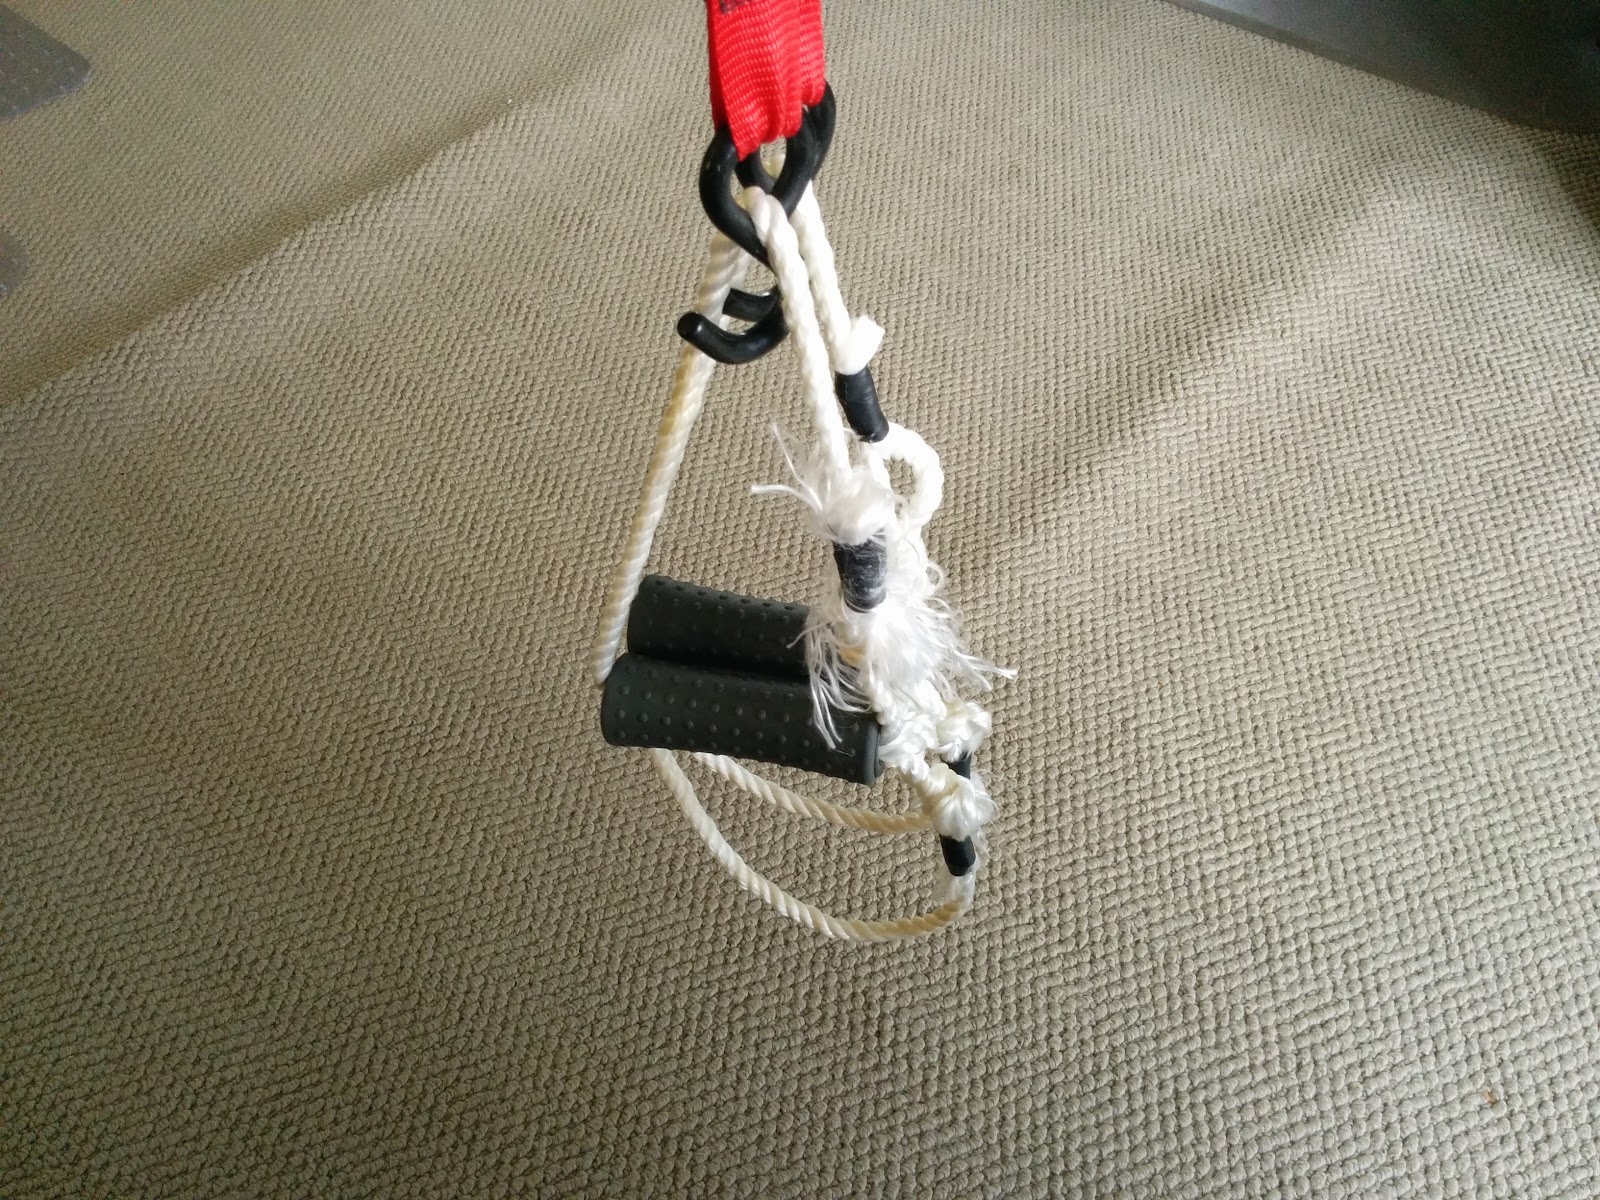
Next is the tedious task of making the loops for the handles. It can be annoying because you want them to be as close to the same size as possible. Using a bowline knot will safely stay tight when you are working out, and allow you to make adjustments if the loops are not the same size.
If you use better rope, it won’t instantly fray like mine did. My knots stay tight, but the feathery strands flapping about are annoying while working out, so I attempted to gather them and tape them together and out of the way.
After you have your handles tied, you can add a second loop below the handle for foot holds if you wish. I did, and followed the same pattern as the handles.
After that, simply attach the other end of the lashing straps to the carabiner and hook it up. Done and done.
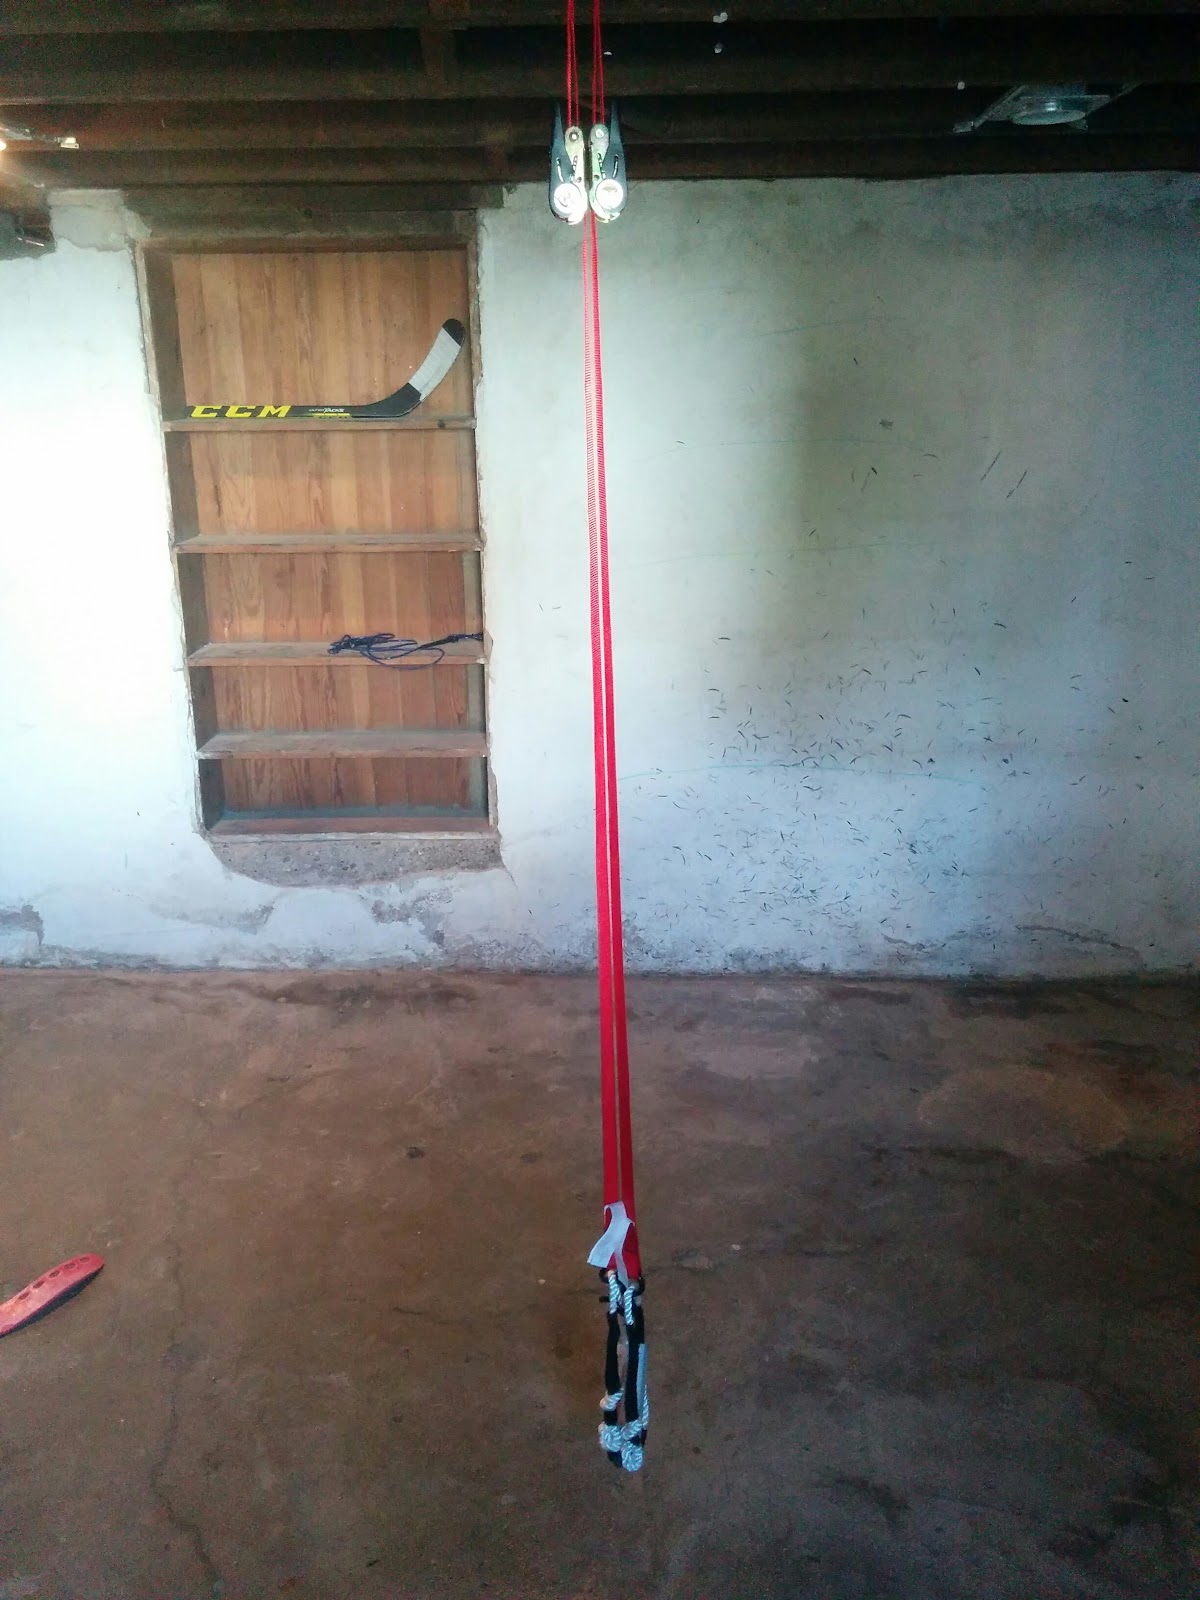
For less than $30, I now have 2 complete home gyms. The are so many different exercises you can do with this 1 piece of equipment. I also love that it is easy to adjust the difficulty - just move your feet to stand up taller, or lay more vertical. Talk about bang for your buck.
If anyone is interested, I could share my workout routine that only takes me 20 minutes. It’s something anyone can do and customize to suit their lifestyle and preferences. I try to do it every weekday morning right after I wake up. And as I say, it’s just so I don’t feel so awful after playing a sport for fun - I’m not trying to “get ripped” like the people on tv, just tone what I have.
What do you think about how I made my suspension trainer? Is this something you would use if you made one yourself?
No comments:
Post a Comment